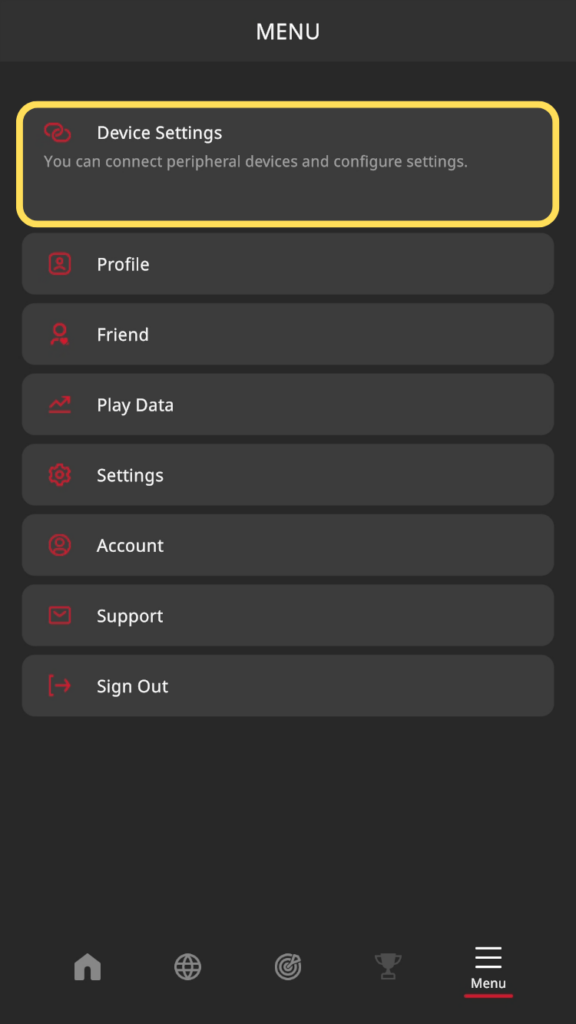
GRAN EYE Initial Settings
Initial Settings for GRAN EYE
GranDarts App Setup
Install the GranDarts app on your smartphone or tablet.


Launch the installed GranDarts application and tap [Click here for new registration].
Follow the on-screen instructions to create an account.
If you have used GRANBOARD before
If you already have an account on the GranBoard application, you can use the same account. Tap “Log in with GranBoard account” and enter your existing account information to log in.

GRAN EYE Initial Settings
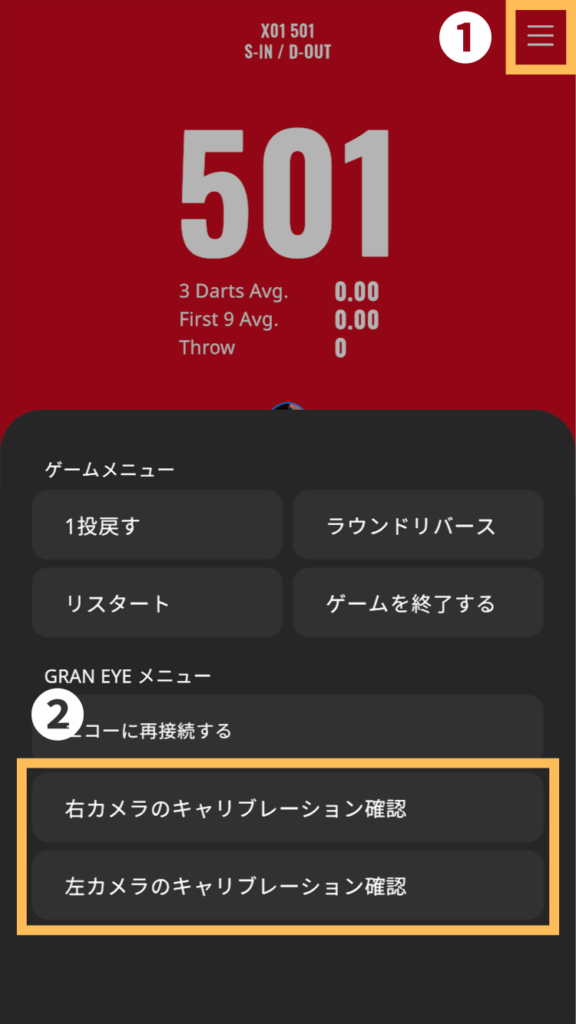
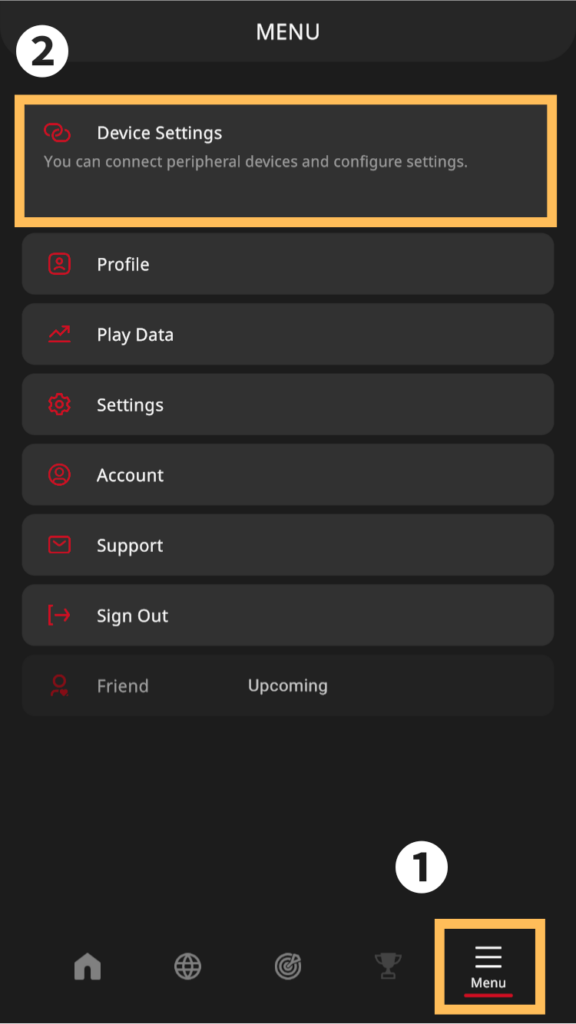
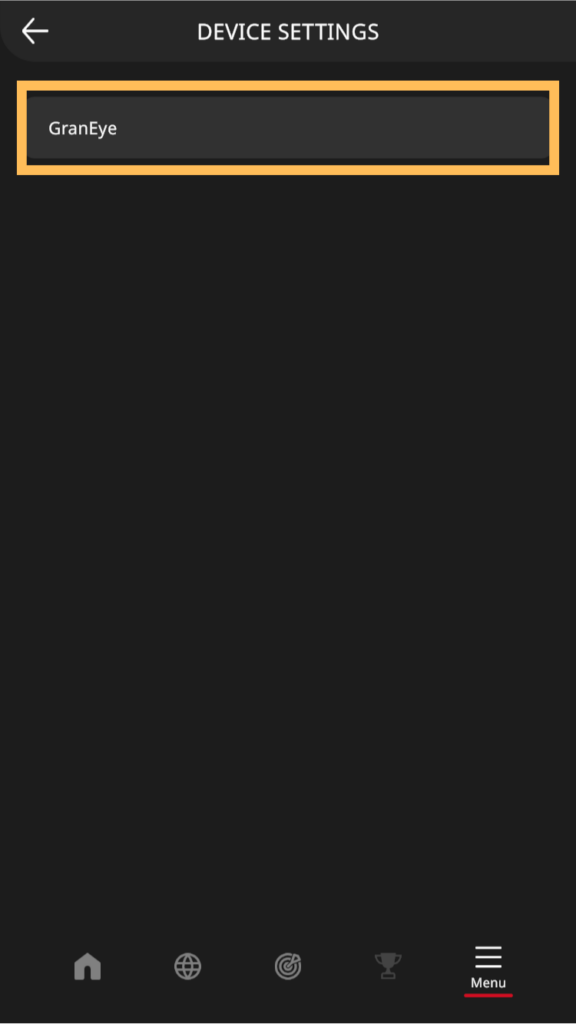
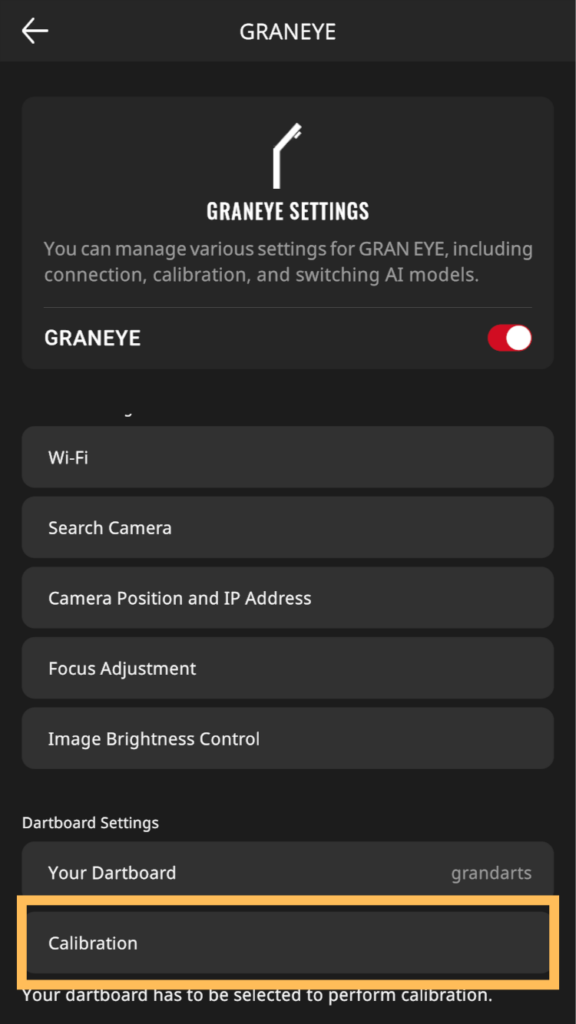
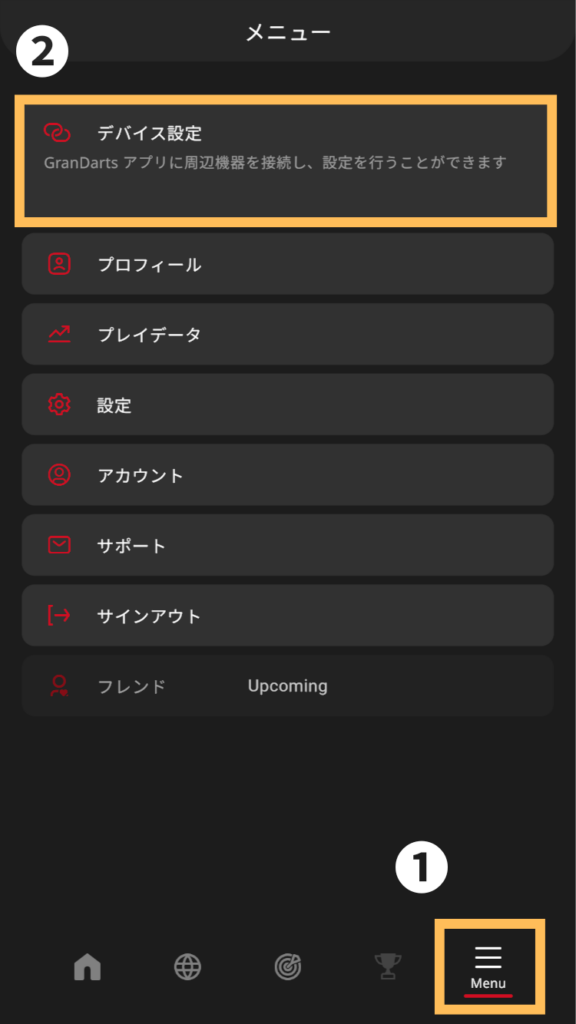
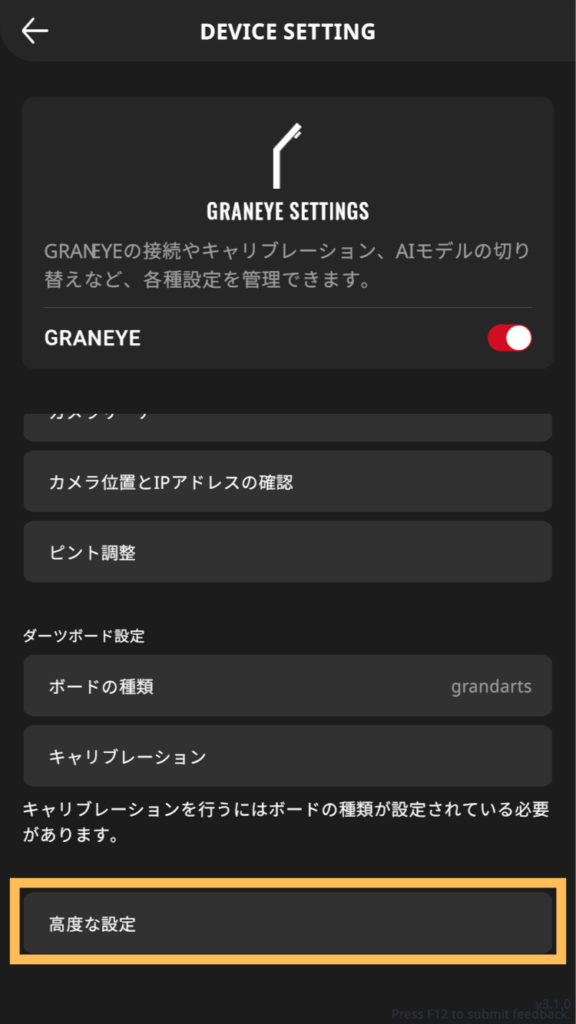
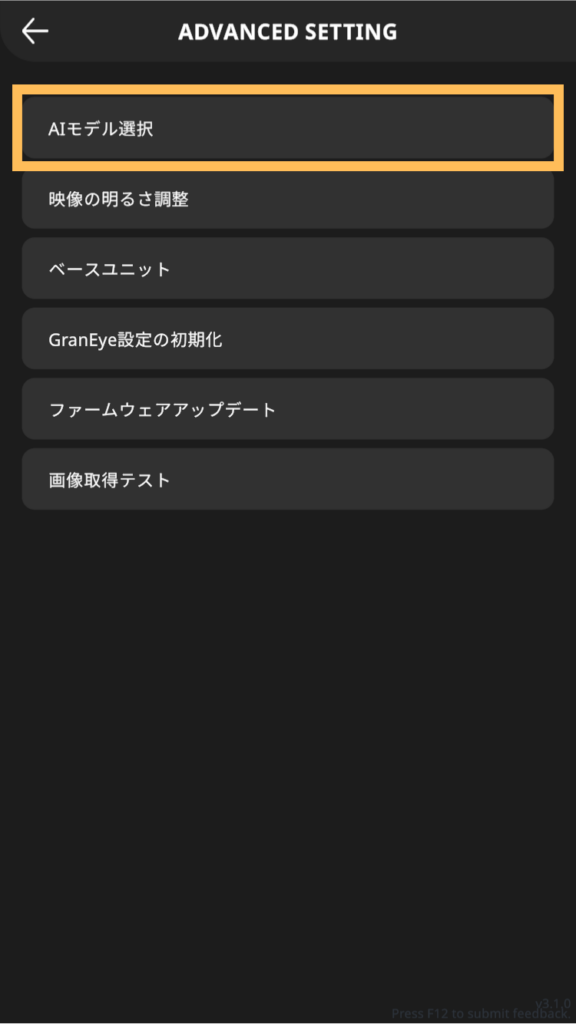
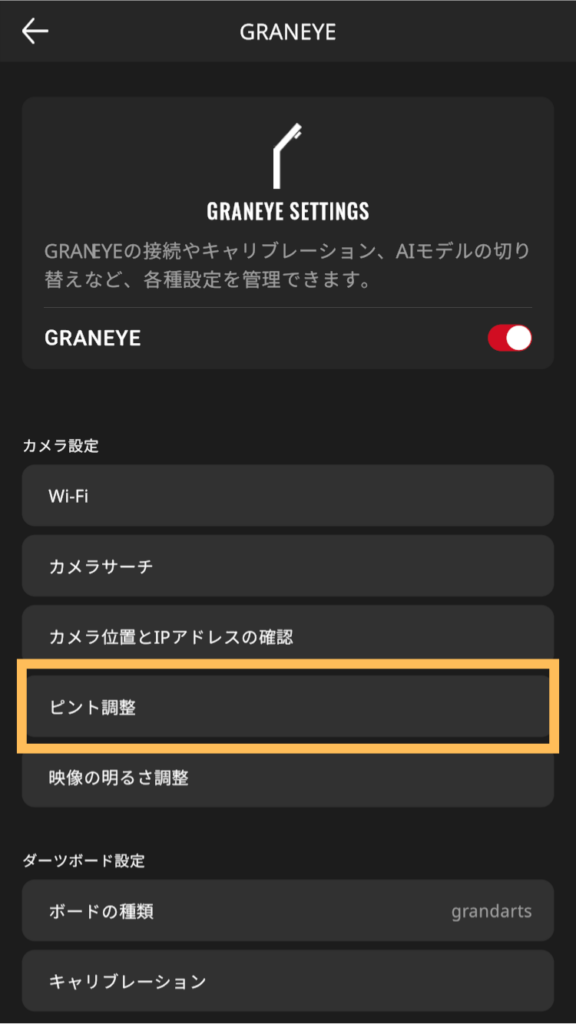
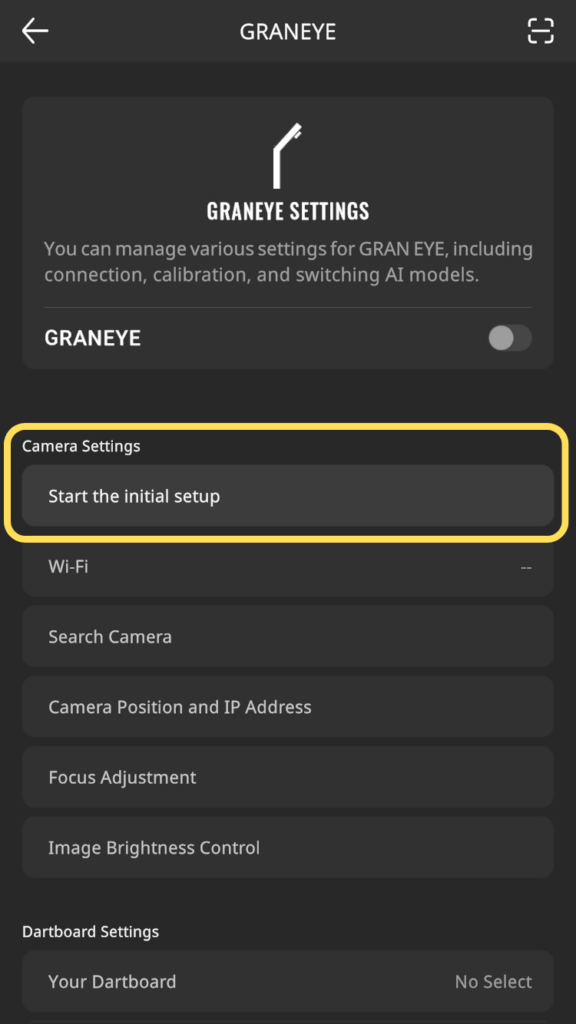
Open GRANEYE SETTING by operating the GranDarts application in the following order.
Tap “Start the Initial Setup.”
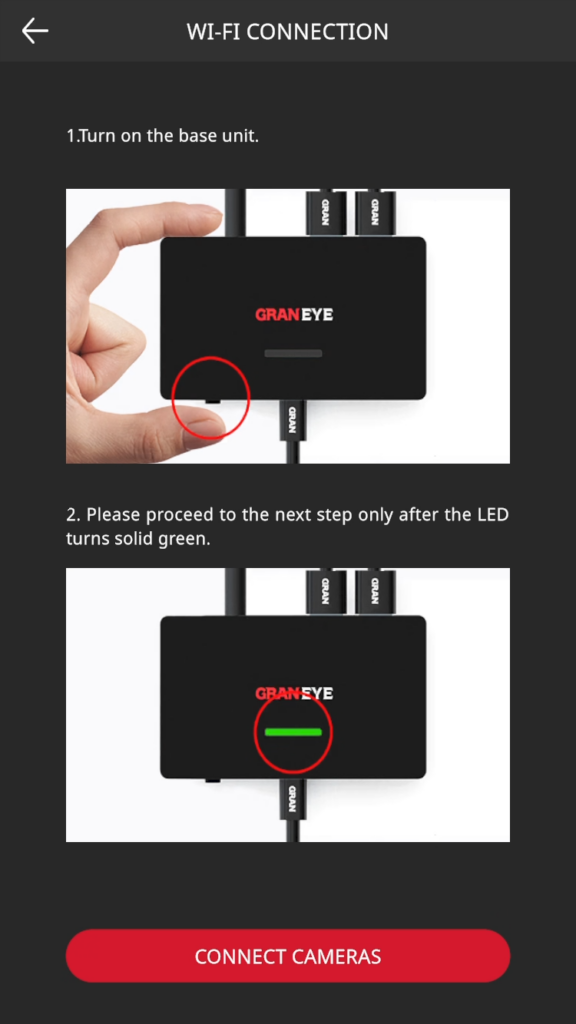
Follow the on-screen instructions to turn on the GRAN EYE.
Confirm that the LED lamp on the base unit is lit green and proceed.
Enter the SSID and password of the Wi-Fi to be connected.
Please use 2.4GHz frequency band. 5GHz is not supported.
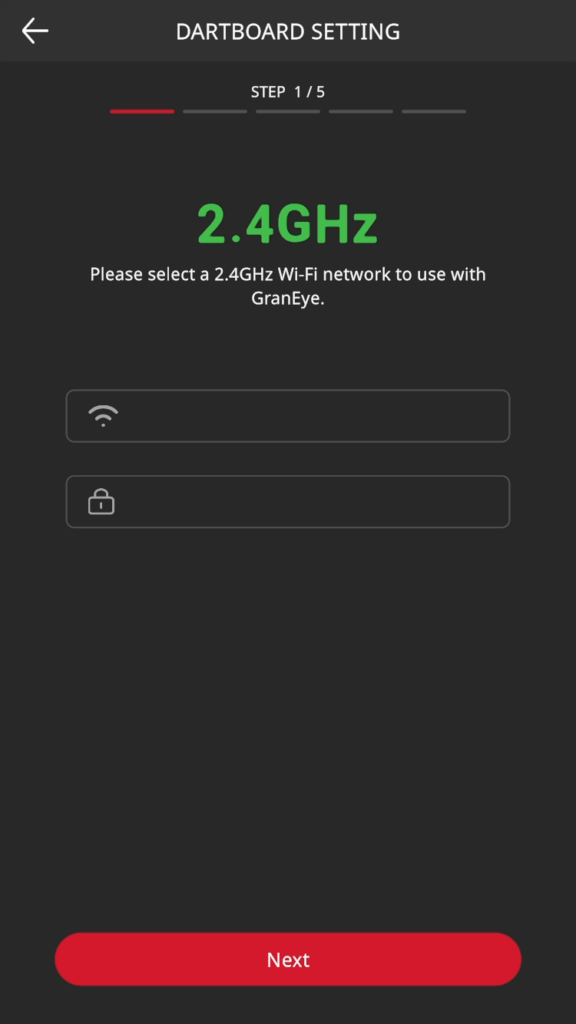
- Typing errors in SSID or password
- Contains an extra space at the end
- Uses 5 GHz Wi-Fi
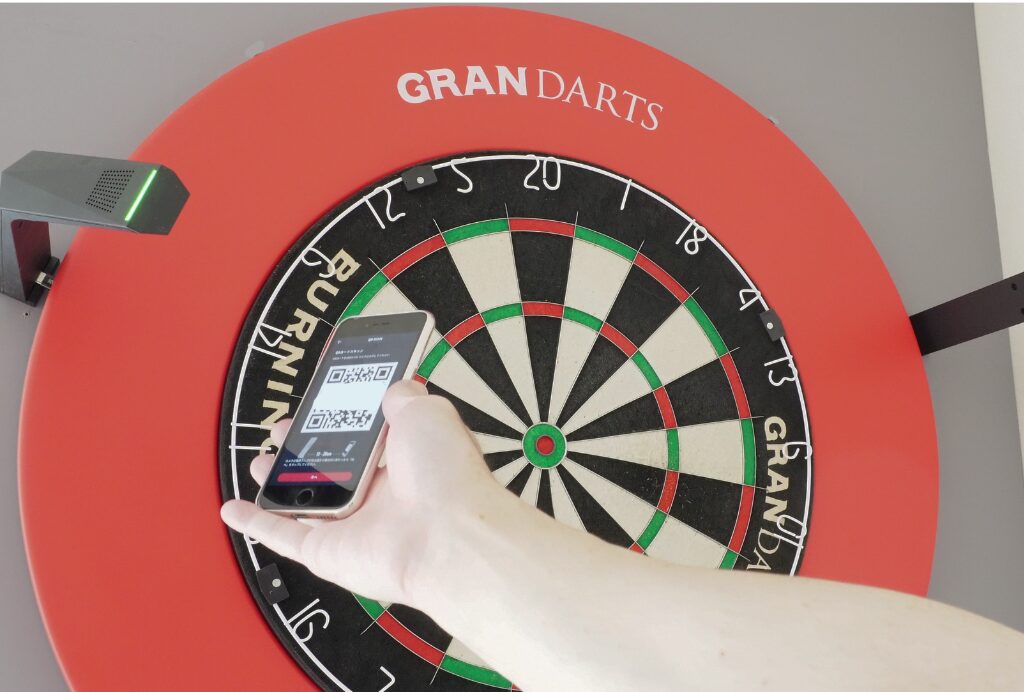
Follow the on-screen instructions and a QR code will appear.
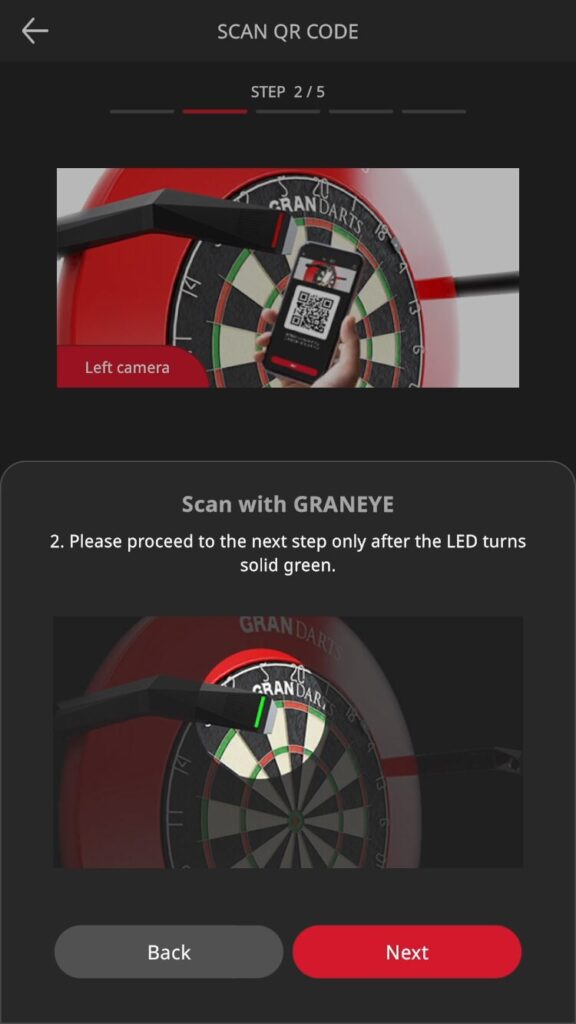
Scan the QR code by holding it over the camera on the left side of the screen.

When the camera’s LED light changes from blinking red to blinking green, the scan is complete.
Move the device away and wait until the LED changes from blinking to solid.
Tap “Next” when the light turns green.
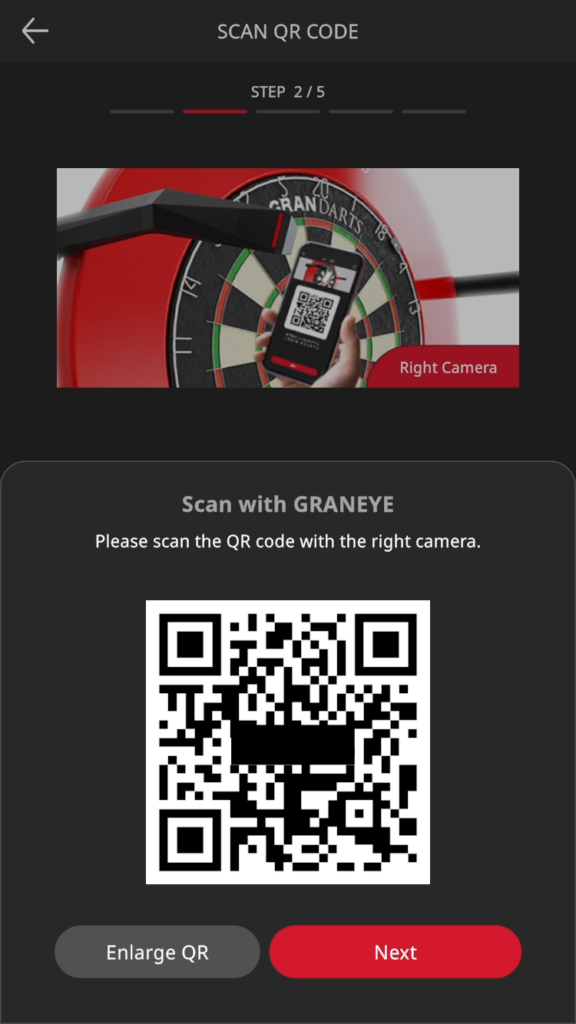
The QR code to be scanned by the right camera will then be displayed.
Follow the same procedure to scan the QR code displayed by the right camera.
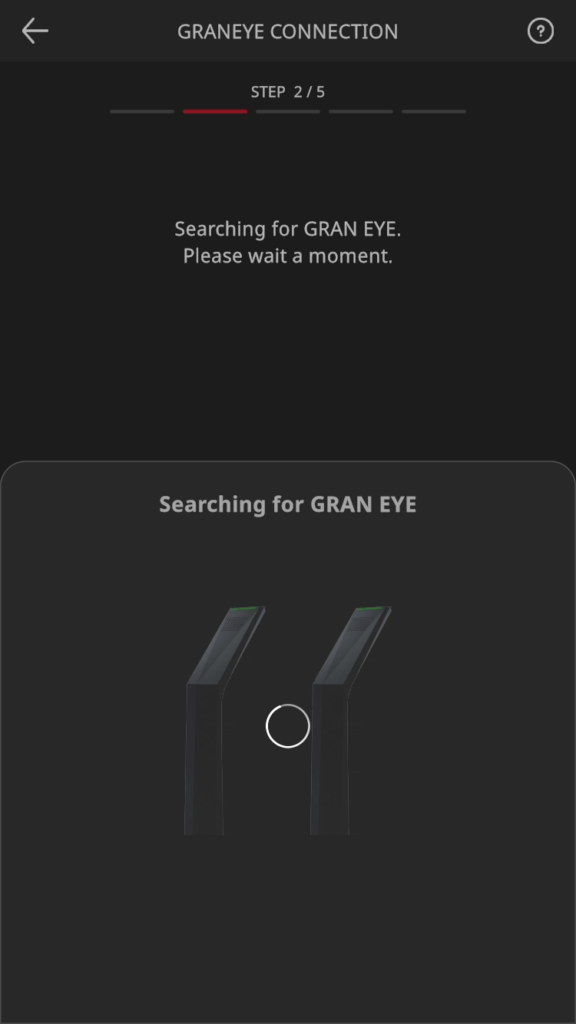
The camera search is executed automatically, please wait until two cameras are connected.
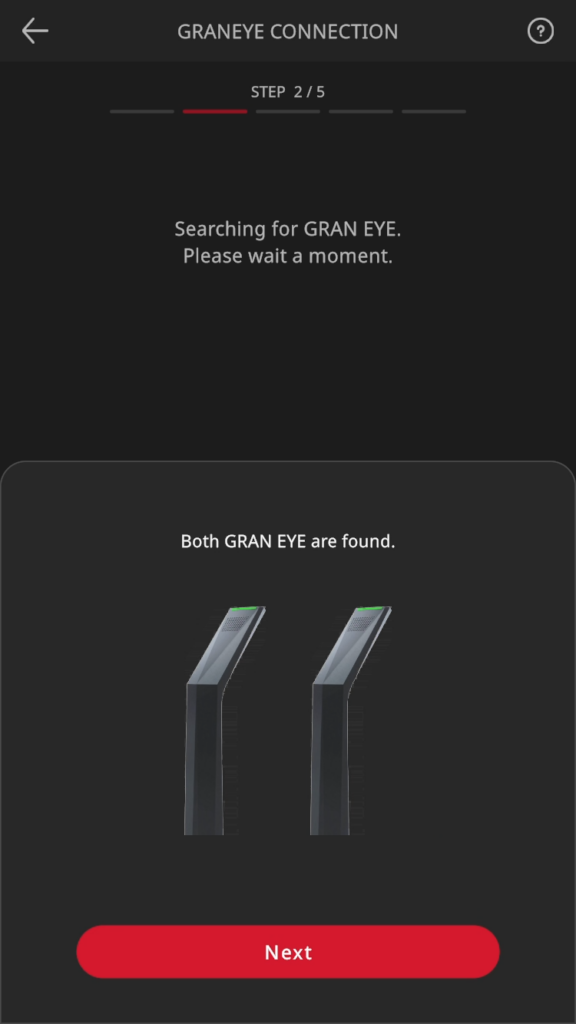
Tap “Next” when it appears and proceed to the next step.
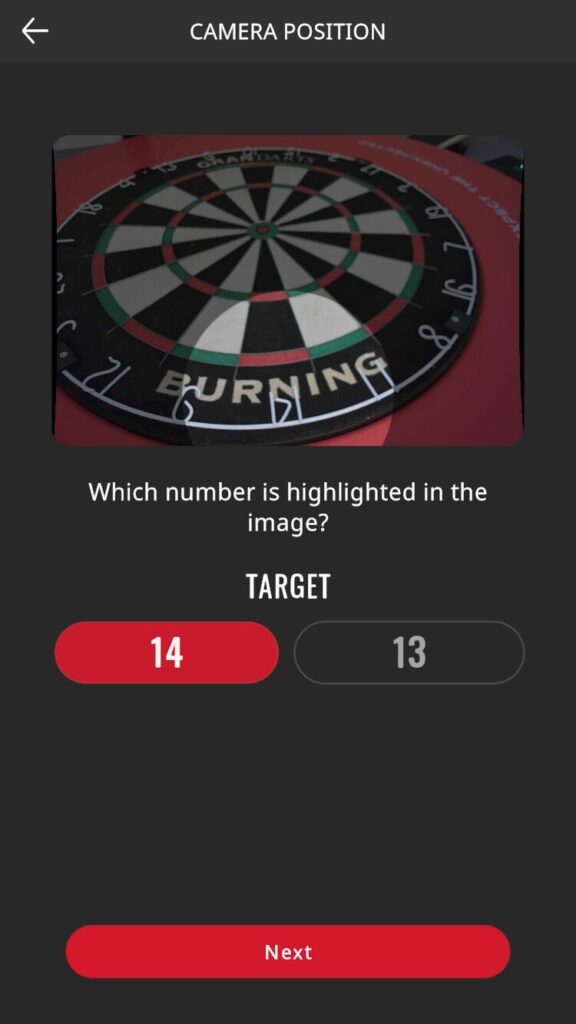
Select the number shown in the camera preview and tap “NEXT”.
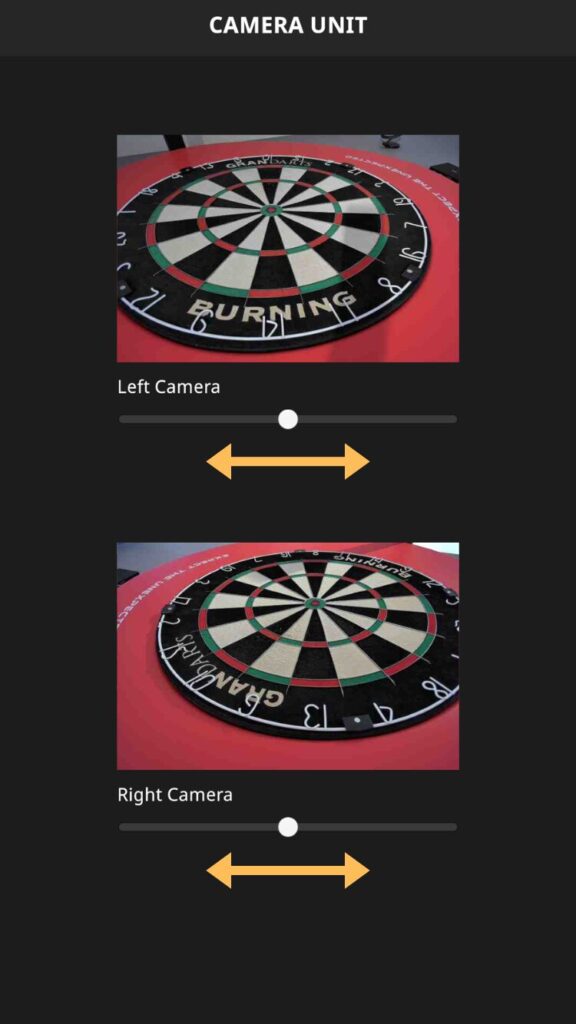
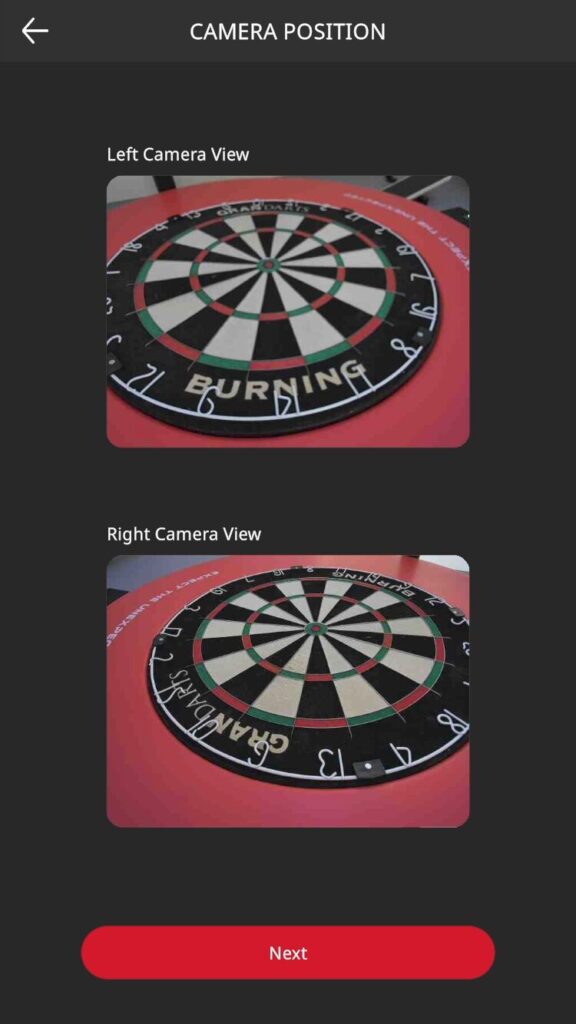
The camera preview will appear.
Confirm that the board (playing area) is within the angle of view, and tap “Next”.
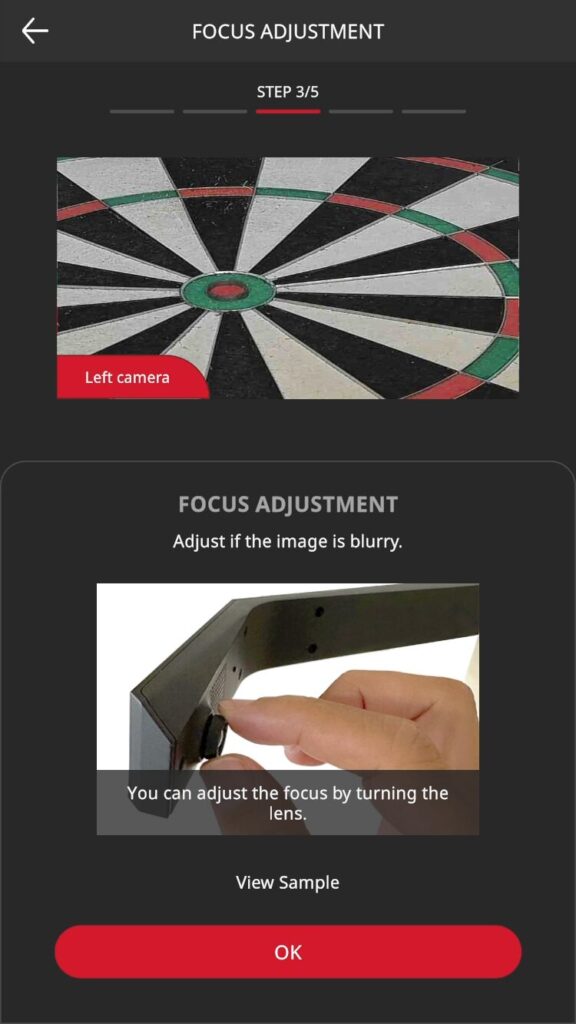
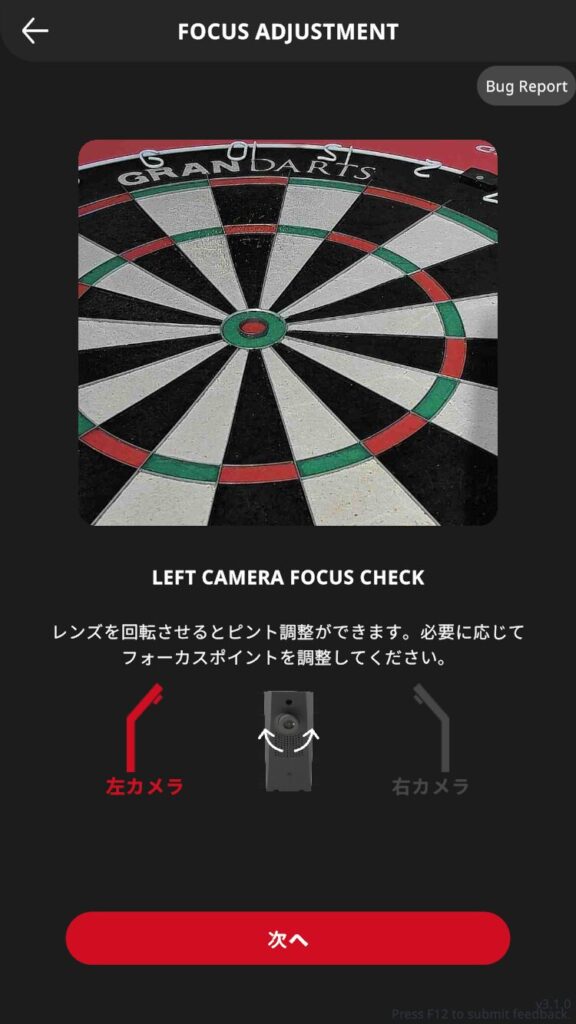
A zoom preview of the left camera will appear.
Make sure the image is not blurred.
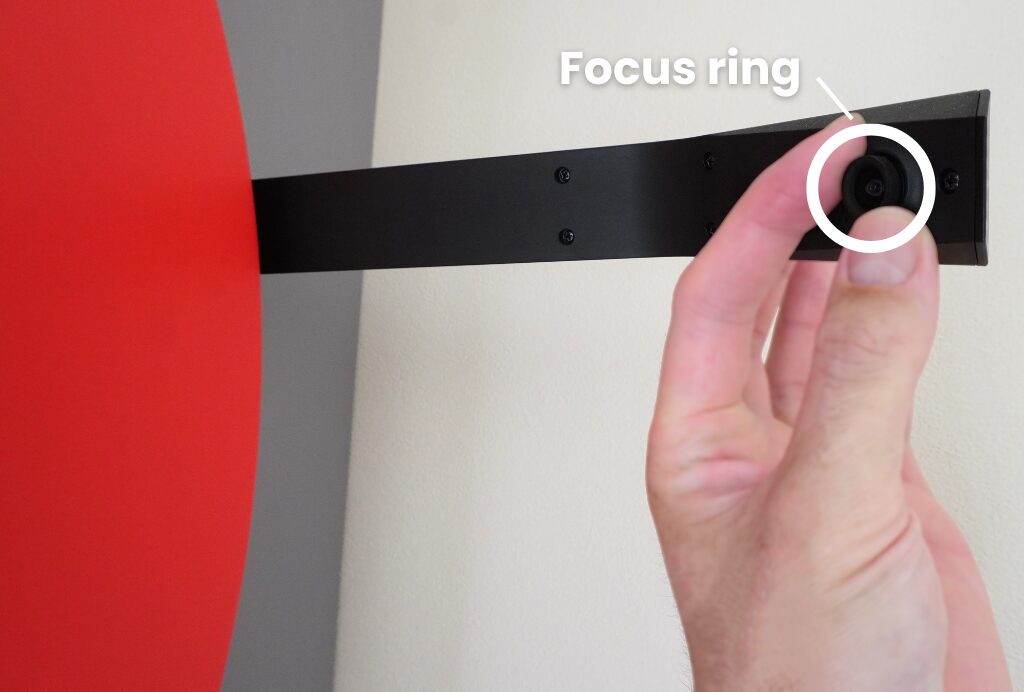
If the image is blurry, turn the camera’s focus ring and adjust it for a clearer image.
Tap “OK” when done.
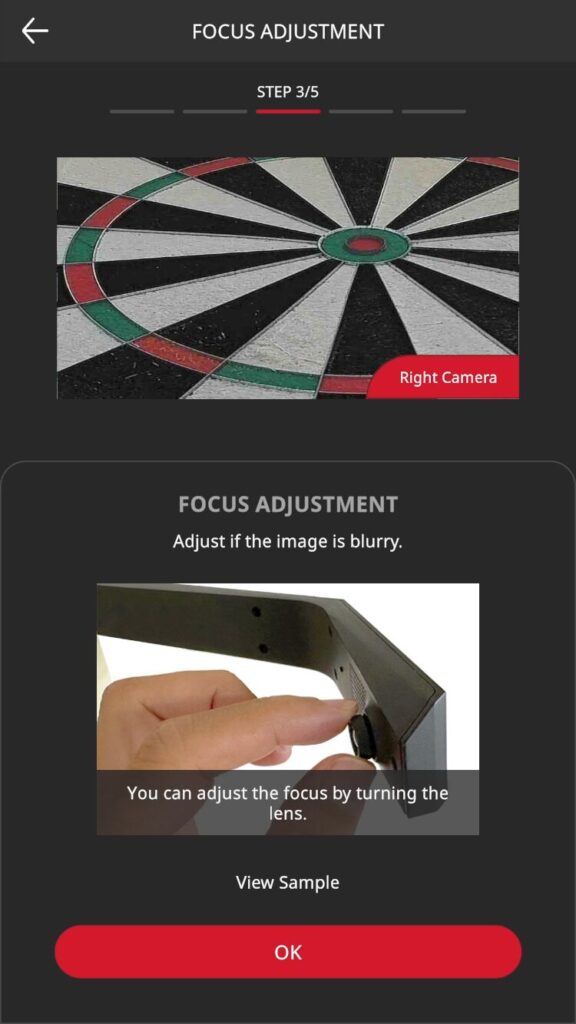
Continue with the zoom preview of the right camera.
Follow the same procedure to adjust the focus.
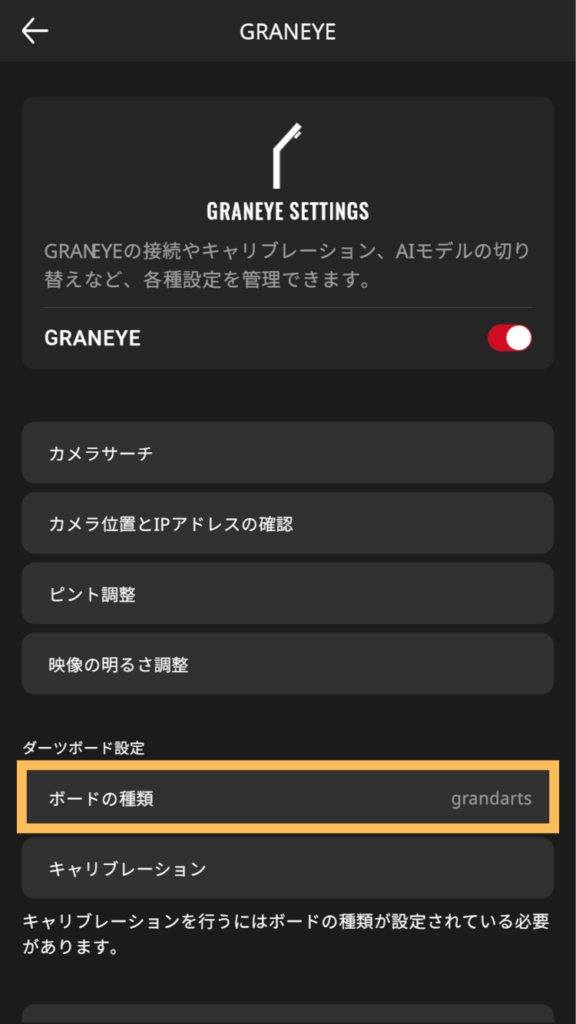
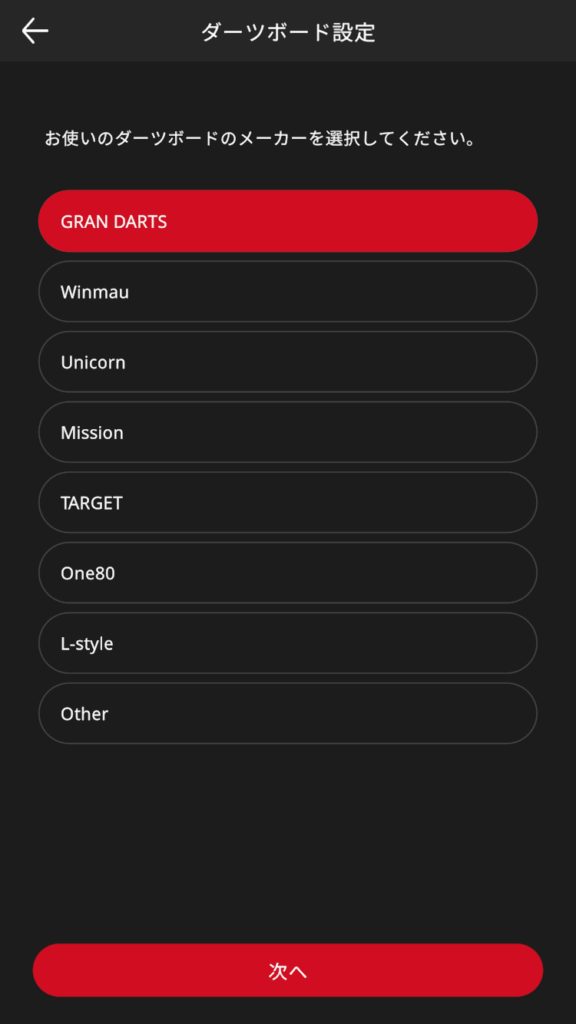
Select the dartboard to be used from the list and tap “Next”.

Tap “Start Calibration”.
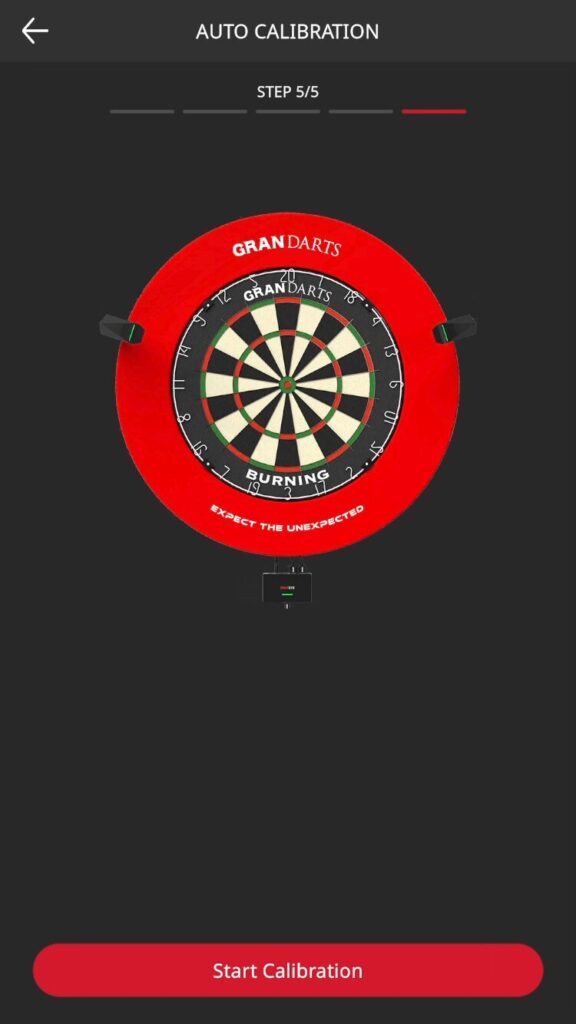
Calibration will start automatically.
Please wait a moment until it completes.
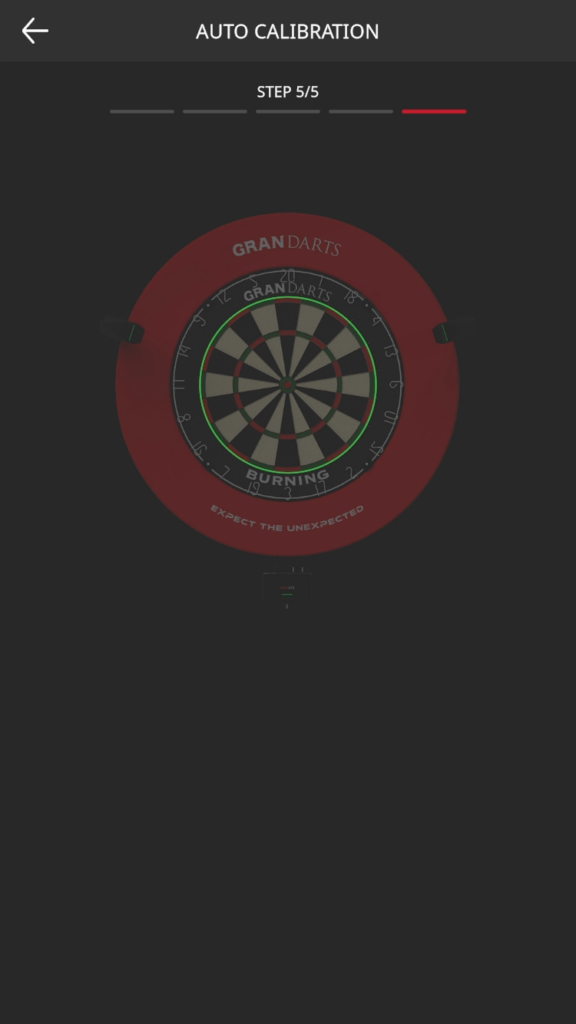
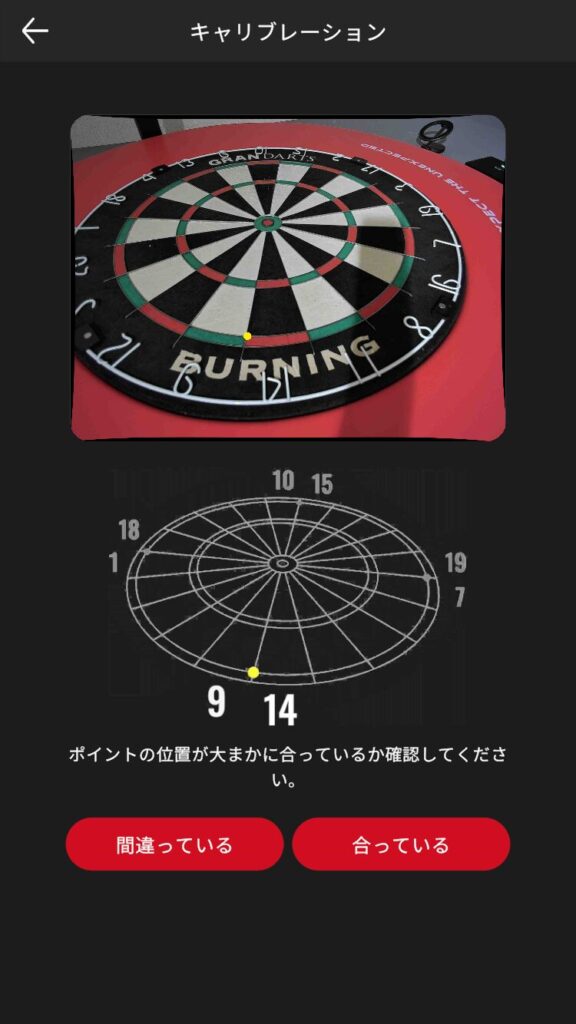
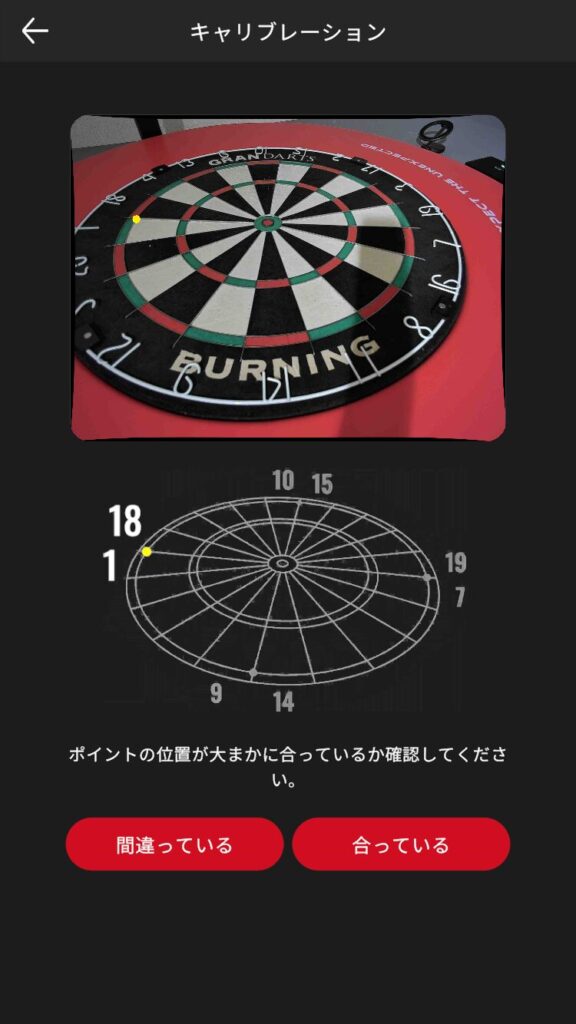
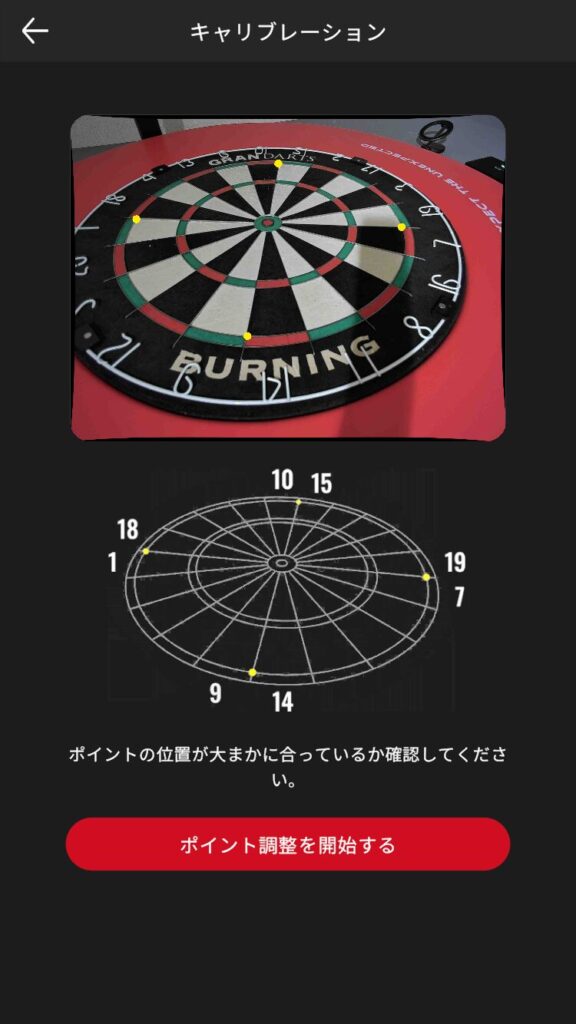
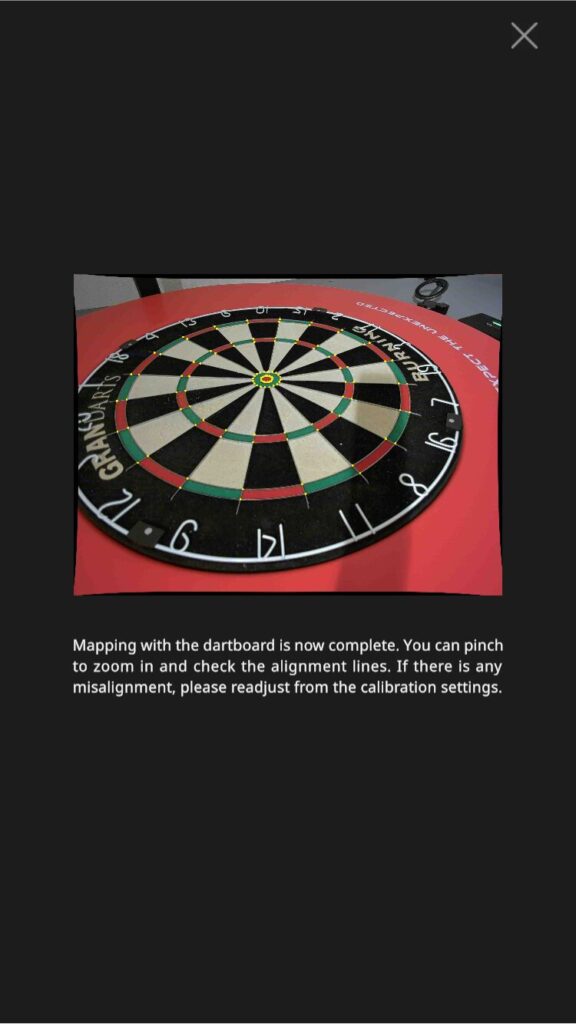
The calibration result will be displayed.
Check that the green lines are aligned with the wires. If they are, tap “OK”.
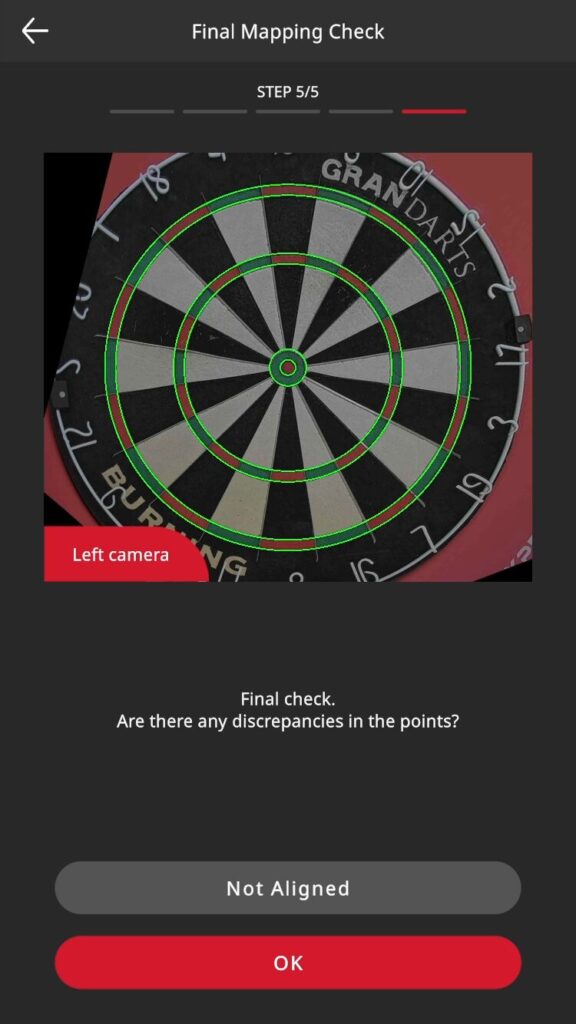
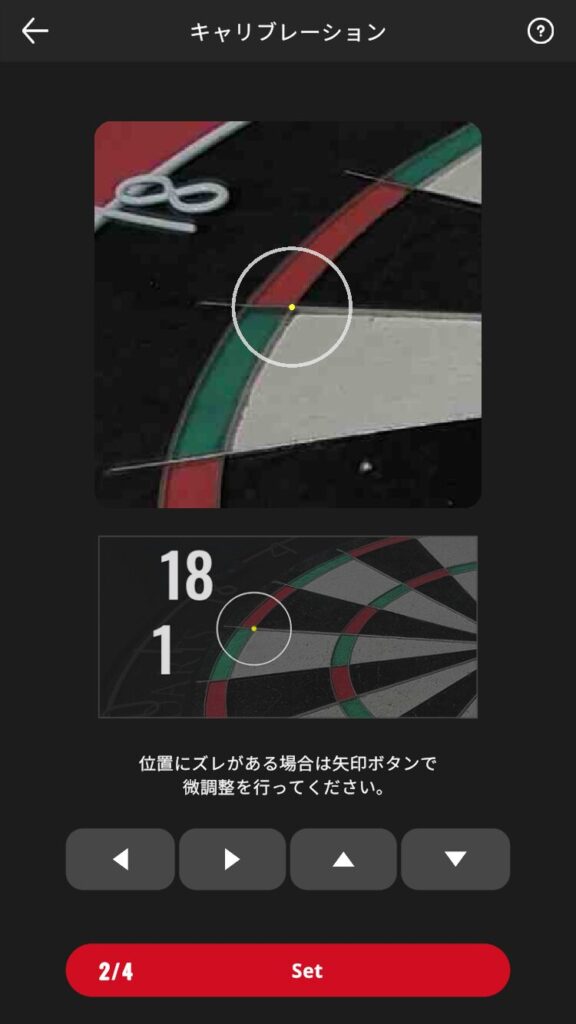
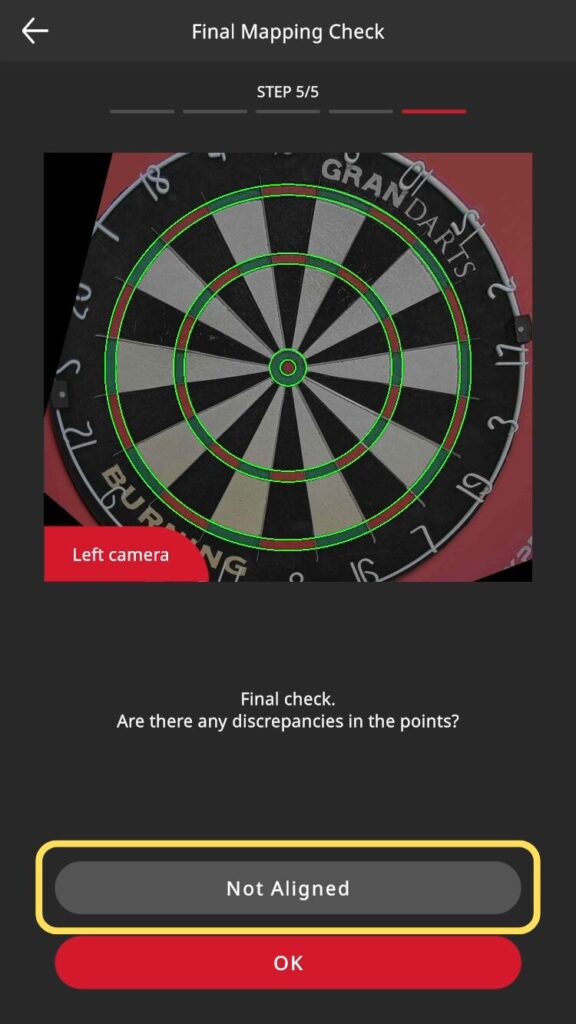
- When the position is out of alignment
-
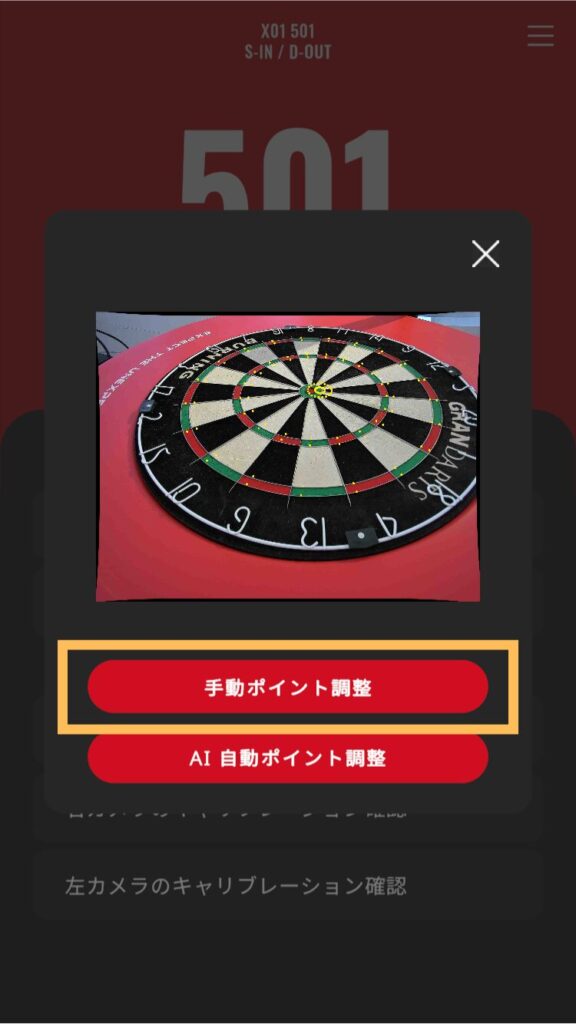
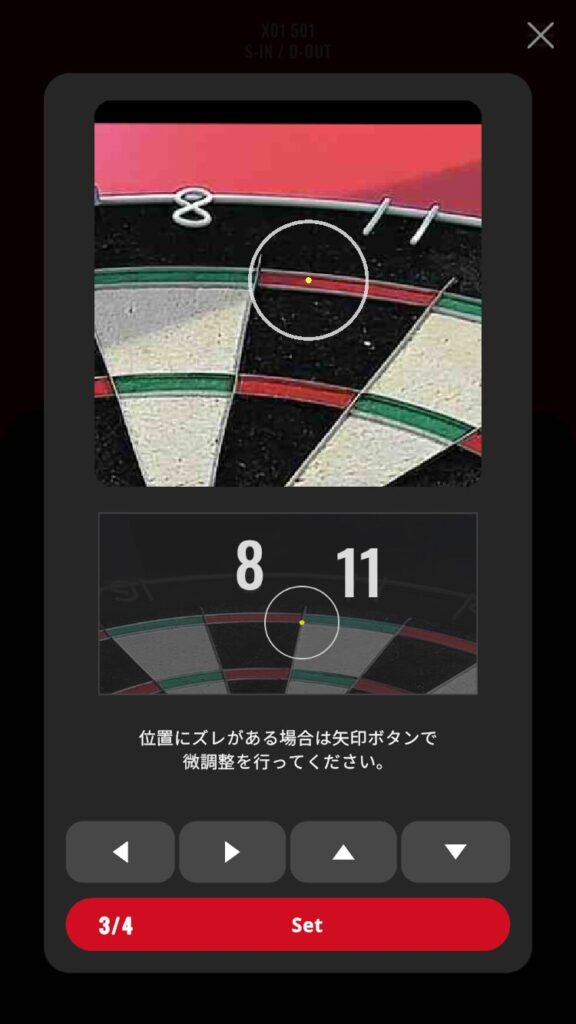
If the line and wire are misaligned, tap “Misaligned” to manually adjust the size of the circle.
Tap the button to adjust the size of the circle and align it so that it overlaps the wire perfectly.
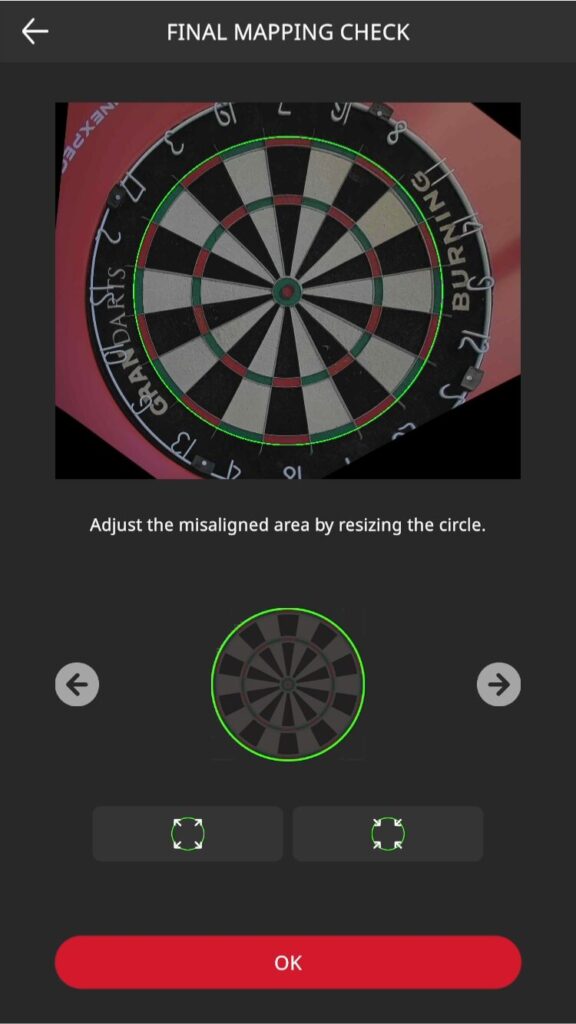
When adjustment is complete, tap “OK” to proceed.
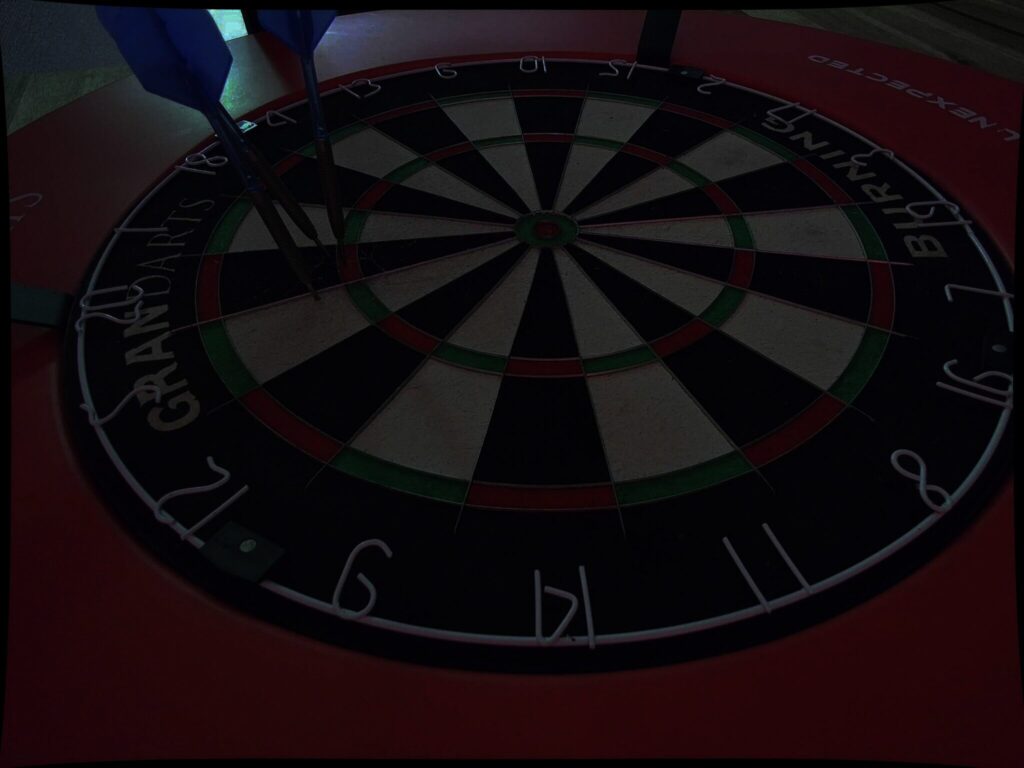
Test that the echo unit is working properly.
Throw darts at the three areas indicated and verify that each area responds.
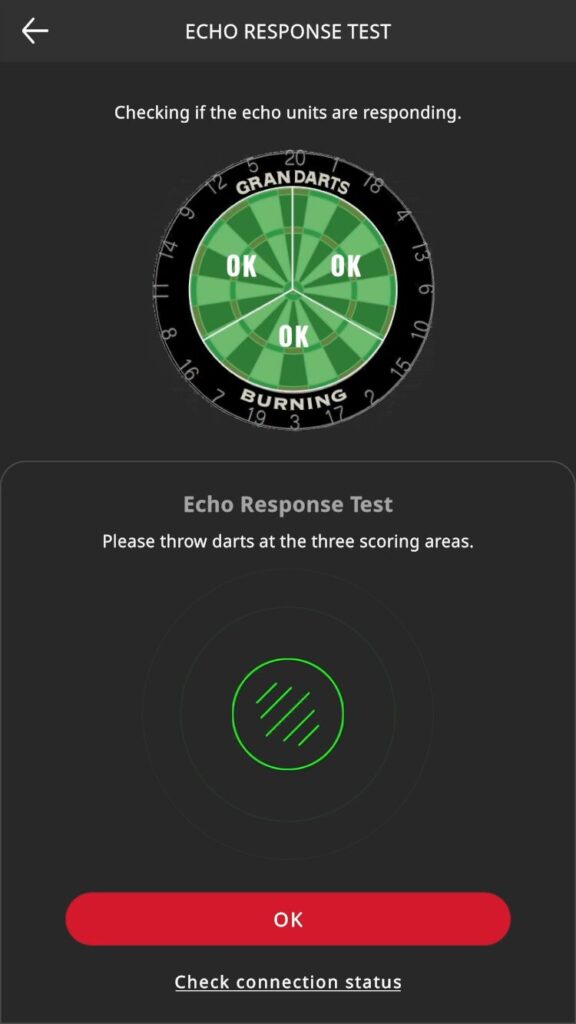
If “OK” is displayed in each area, there is no problem.
Tap the “OK” button to proceed.
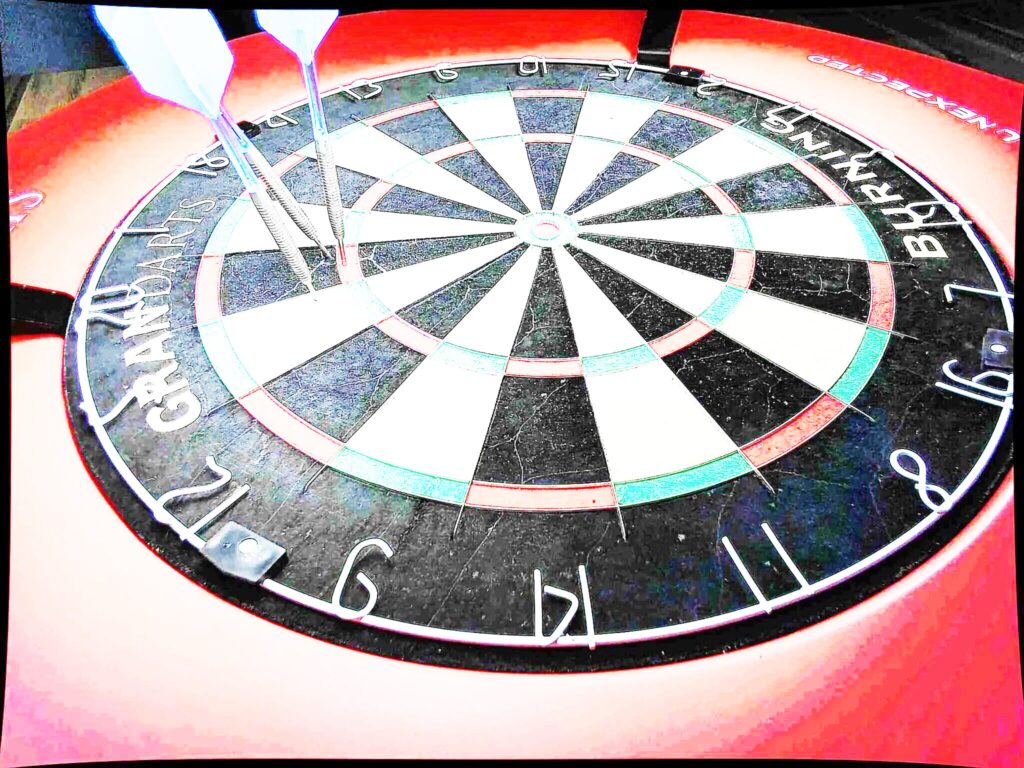
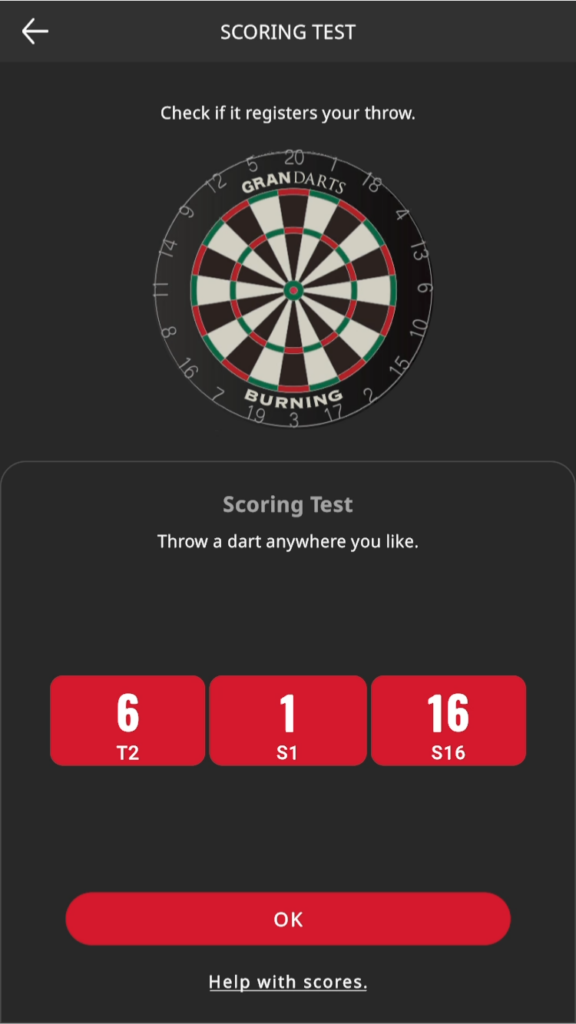
Throw a dart and check if it is scored correctly.
Tap “OK” if everything is OK.
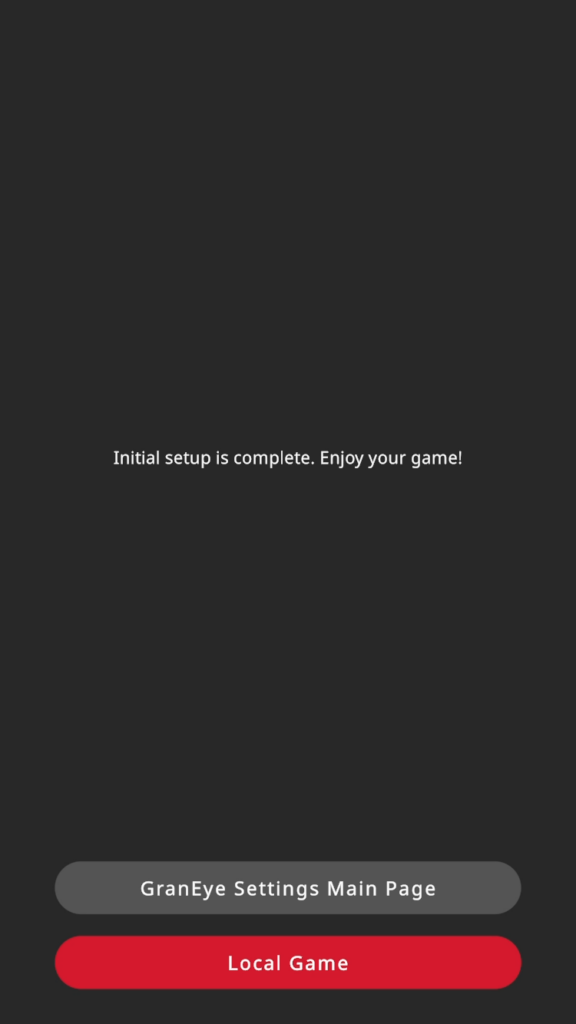
This completes the initial setup.
Please use GRAN EYE and enjoy the game.