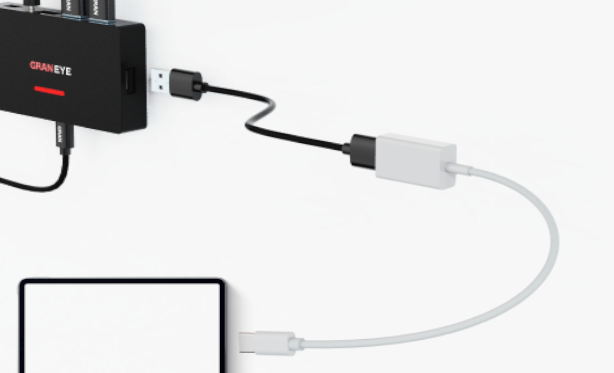
GRAN EYE initial settings (OTG connection)
Initial Setup of GRAN EYE (Using OTG Connection)
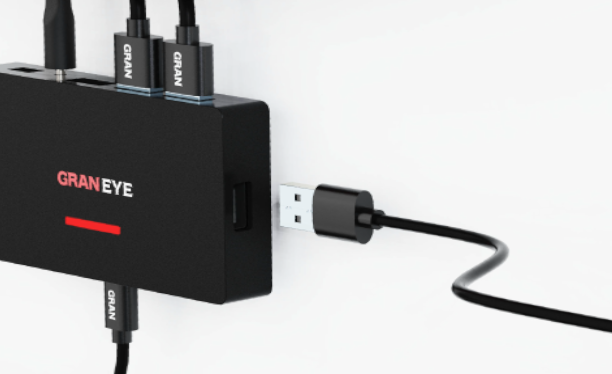
An OTG connection is a method of connecting a USB device directly to a smartphone or tablet.
This feature allows a wired connection between GRAN EYE and an Android device, improving scoring stability and speed.
No additional configuration is required.
Simply connect an Android device that supports OTG and a compatible OTG cable or adapter, and the device will be ready to use.
*Please check the product instruction manual for the OTG compatibility status of your device.
What you need
- Android device with OTG support
- OTG adapter with data communication support
- USB cable
Step 1] Set up the GranDarts application.
Install the GranDarts app on your smartphone or tablet.


Launch the installed GranDarts application and tap [New Registration].
Follow the on-screen instructions to create an account.
If you have used GRANBOARD before
If you already have an account on the GranBoard application, you can use the same account. Tap “Log in with GranBoard account” and enter your existing account information to log in.

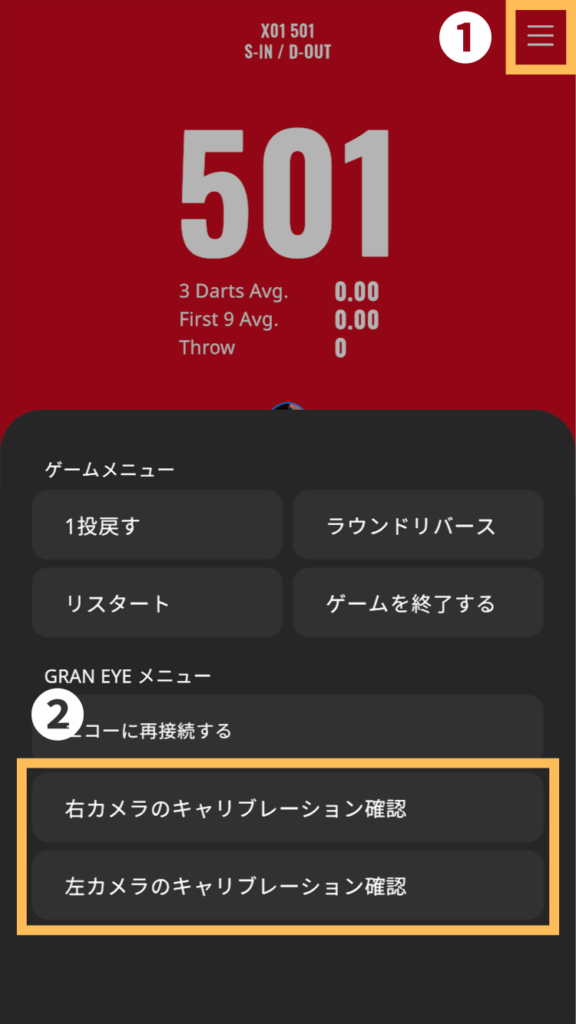
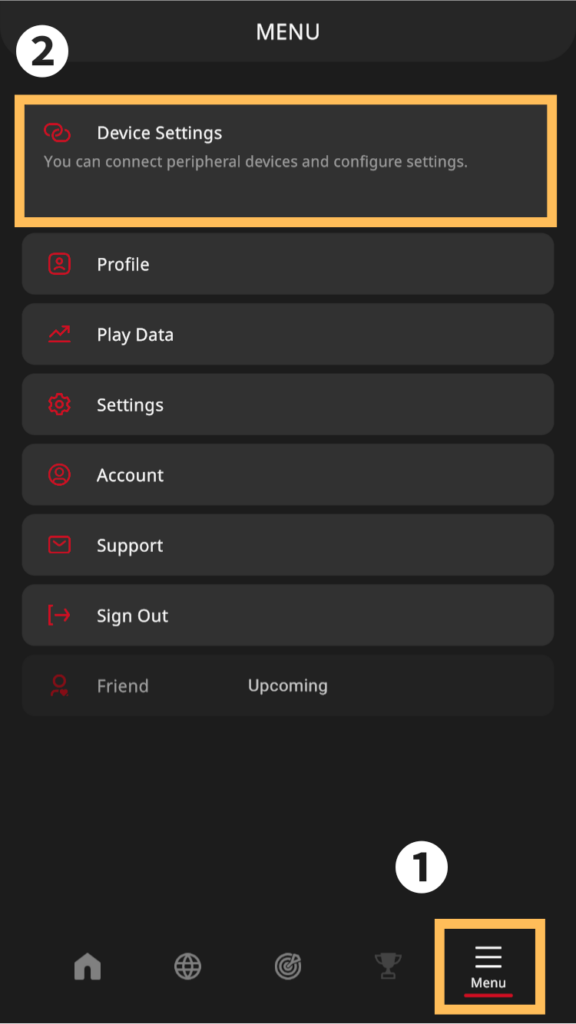
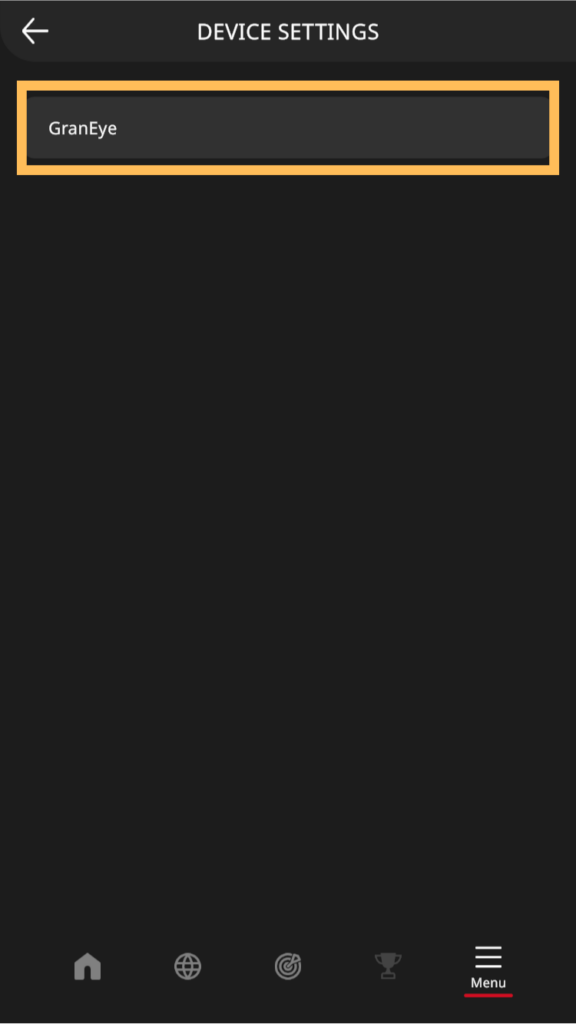
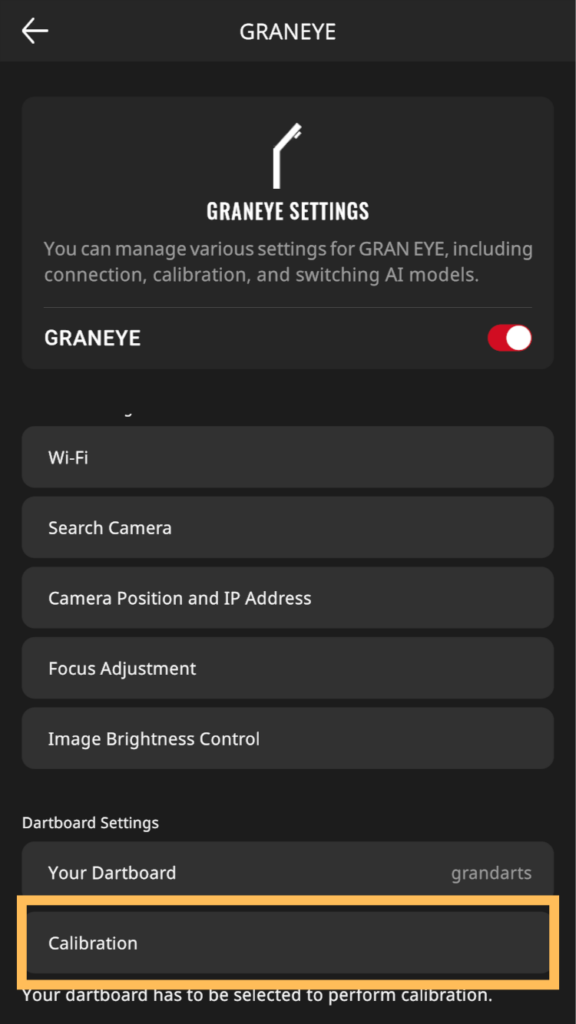
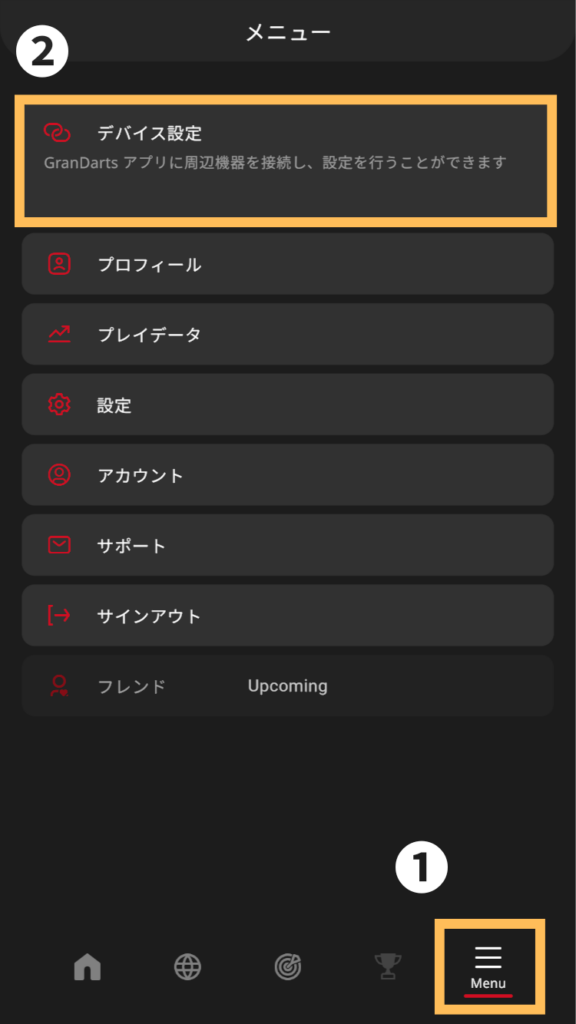
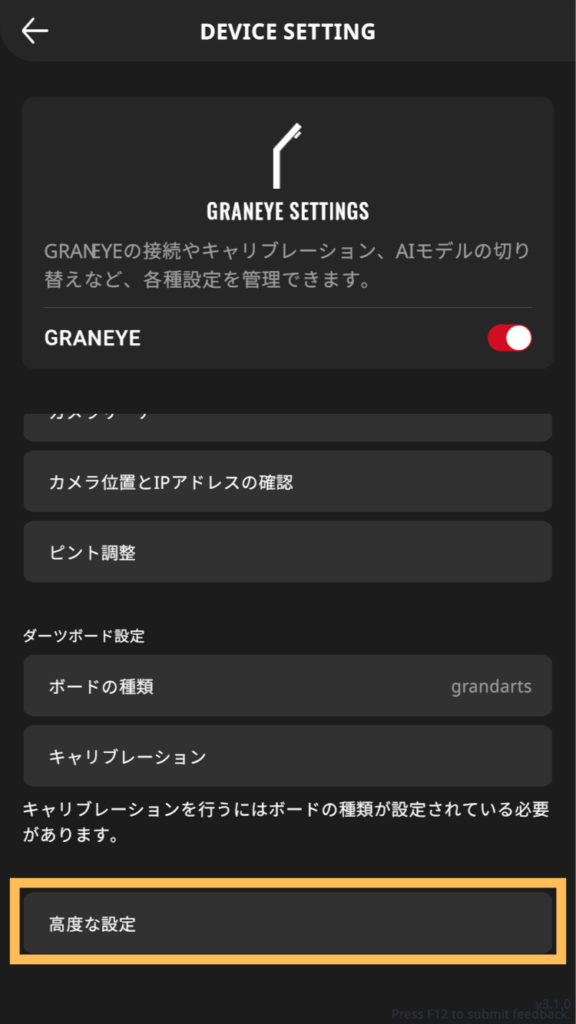
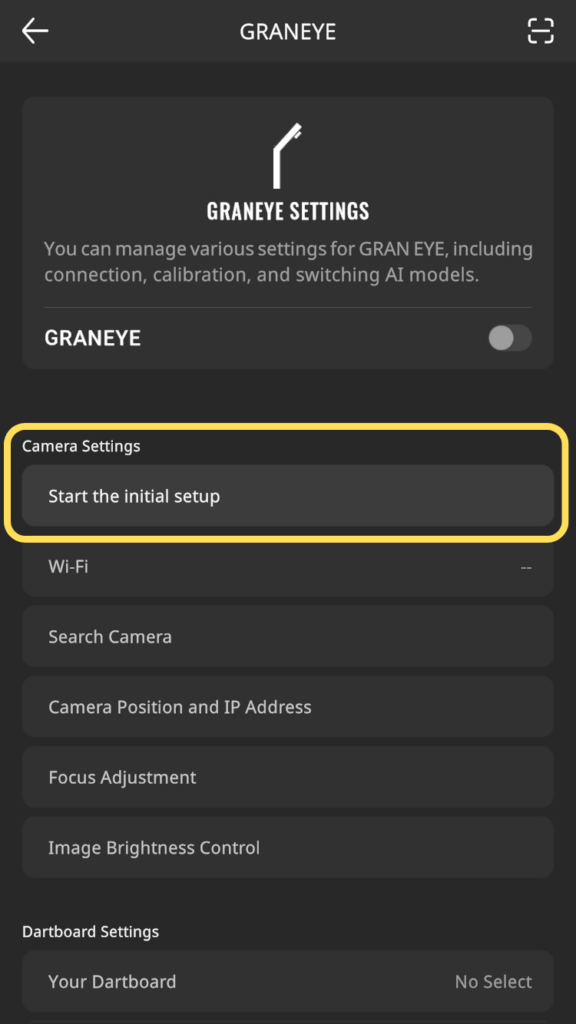
Step 2 Initial settings for GRAN EYE
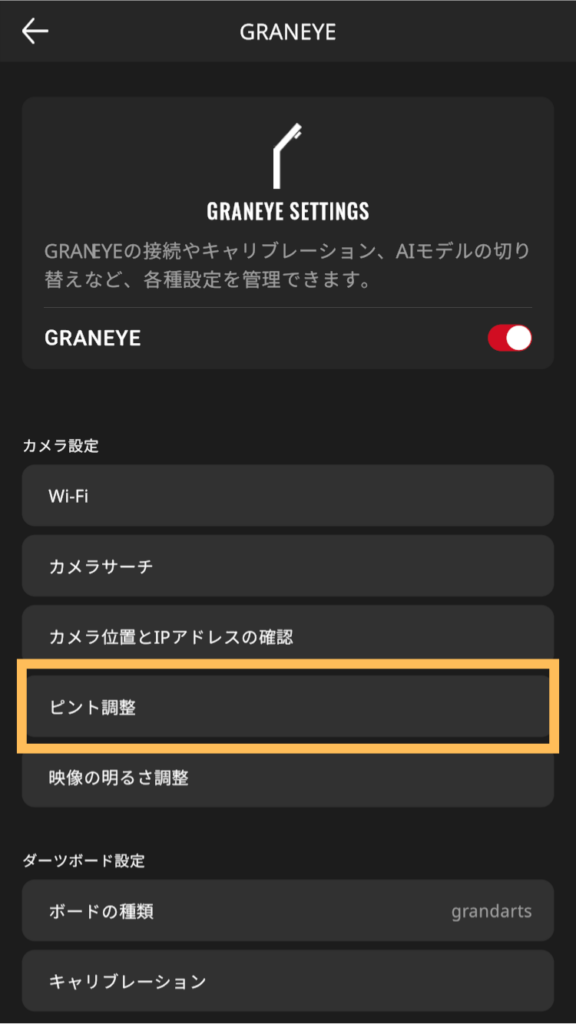
Open GRANEYE SETTING by operating the GranDarts application in the following order.
Tap “Start Initial Setup”.
Follow the on-screen instructions to connect the GRAN EYE to the device.
After the USB connection is complete, tap “Connect with Camera”.
All USB access permissions are granted and the connection will proceed. Please wait a moment until completion.
Connection to GRANEYE is completed.
Tap “Next” to proceed to camera adjustment.
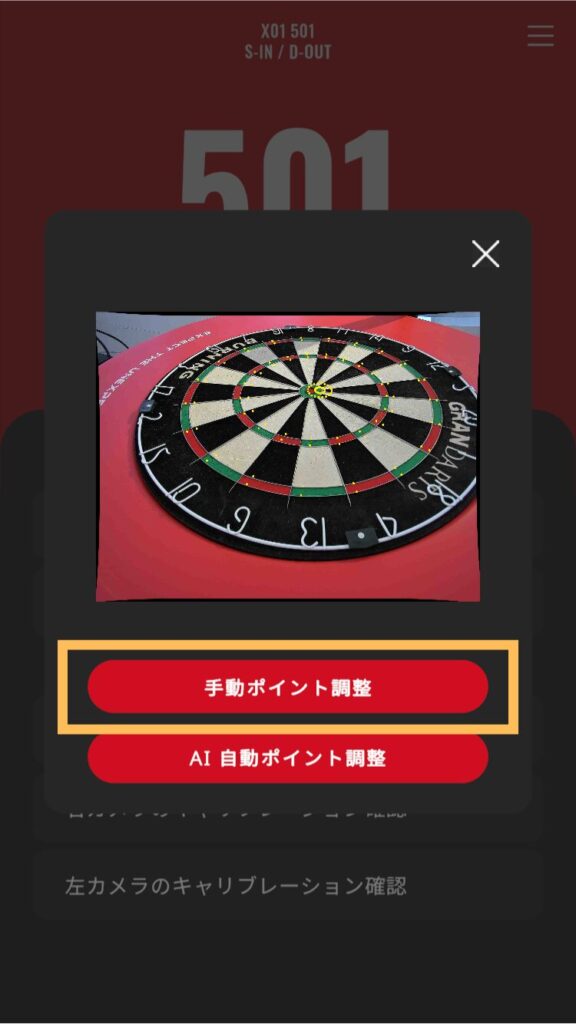
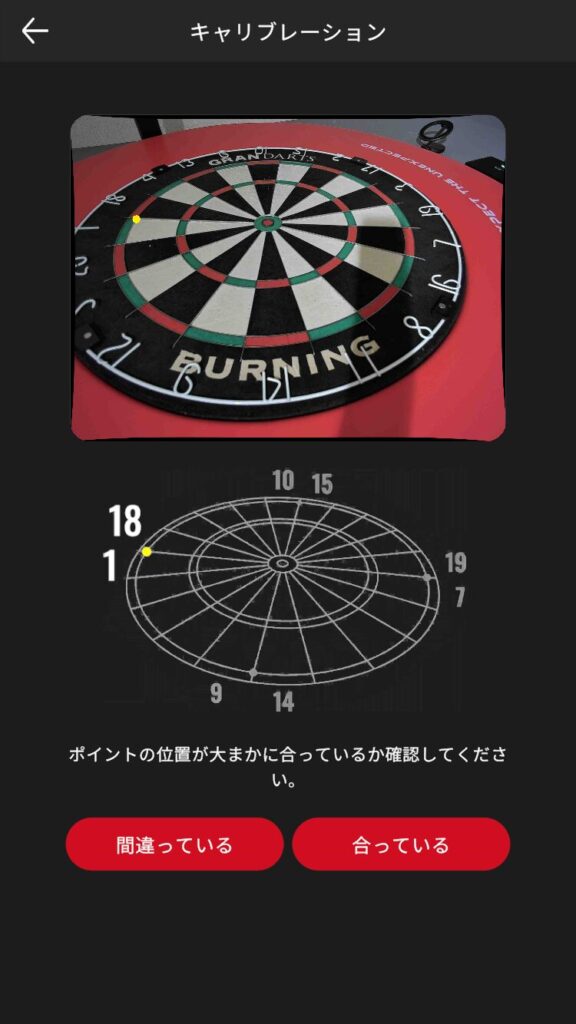
Select the number displayed in the displayed camera image and tap “Next”.
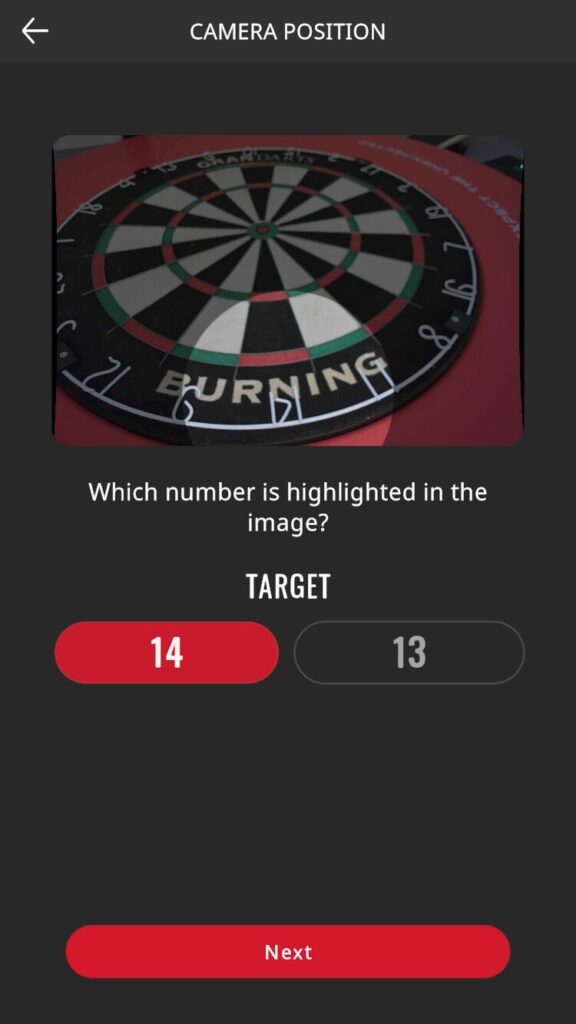
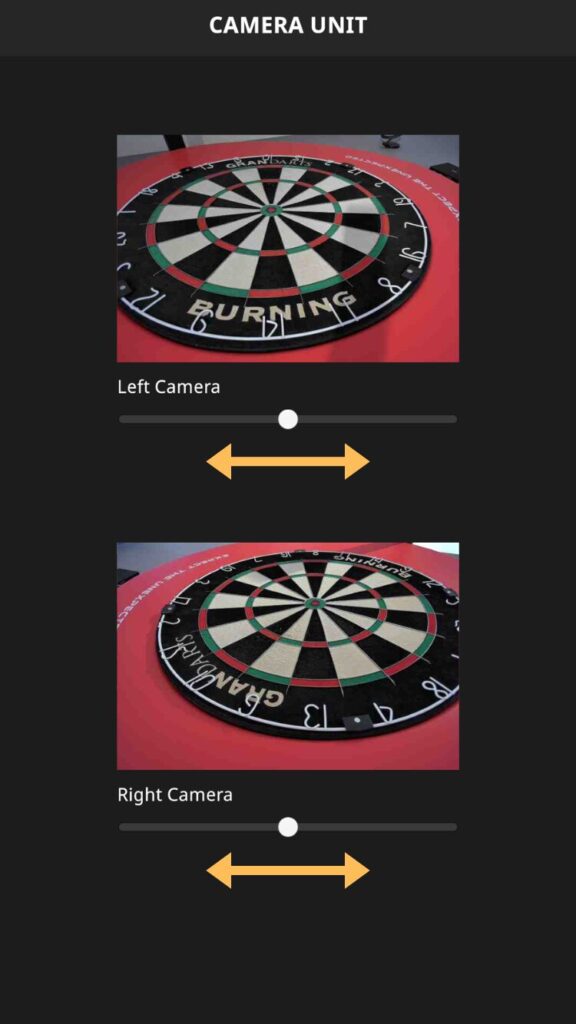
The camera preview will appear..
Confirm that the board (playing area) is within the angle of view, and tap “Next”.
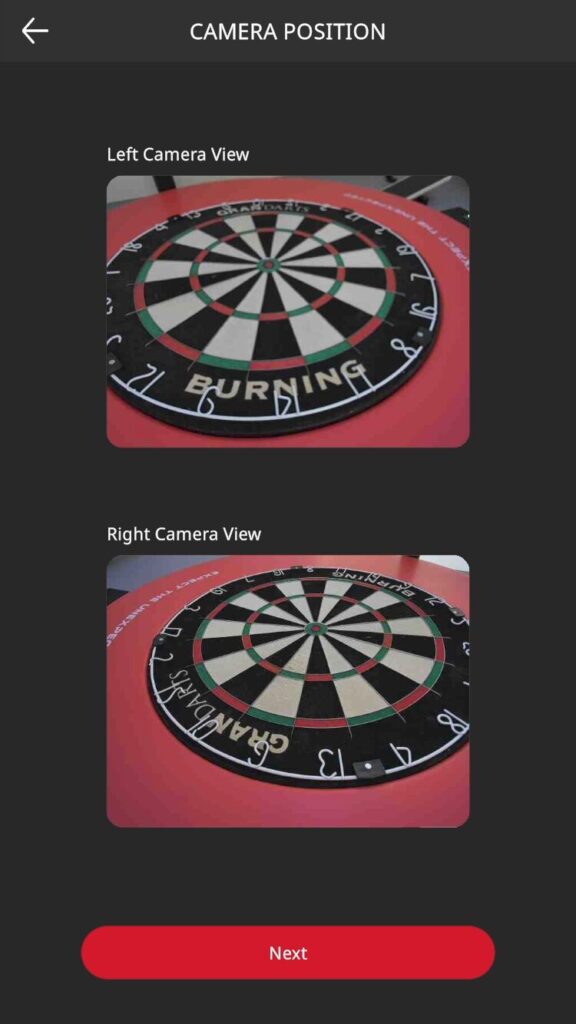
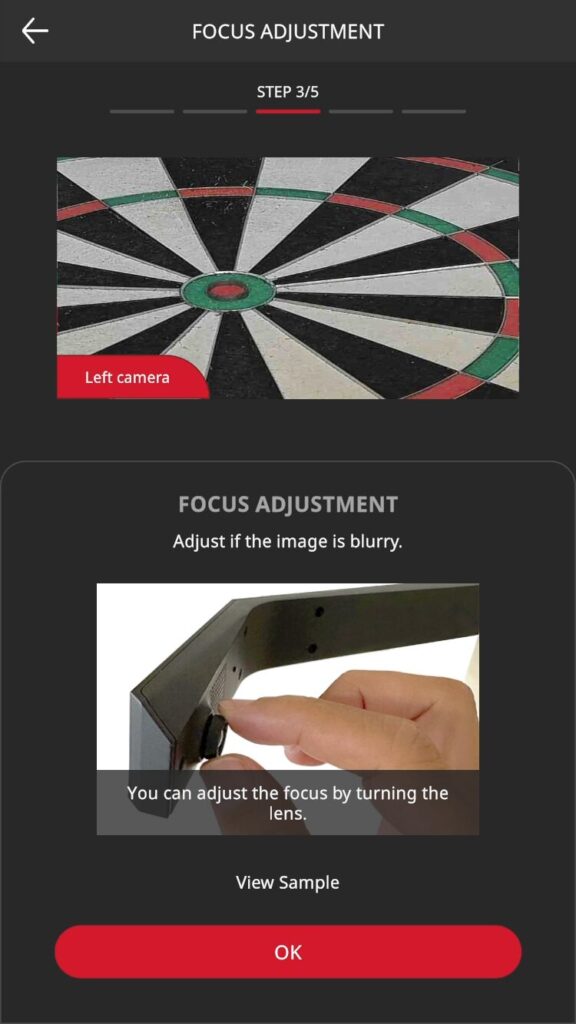
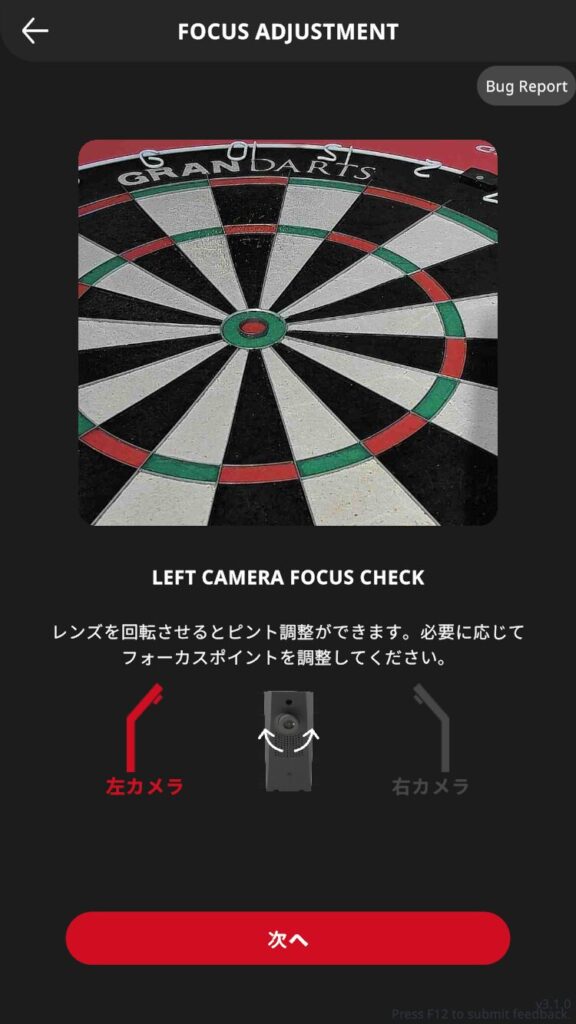
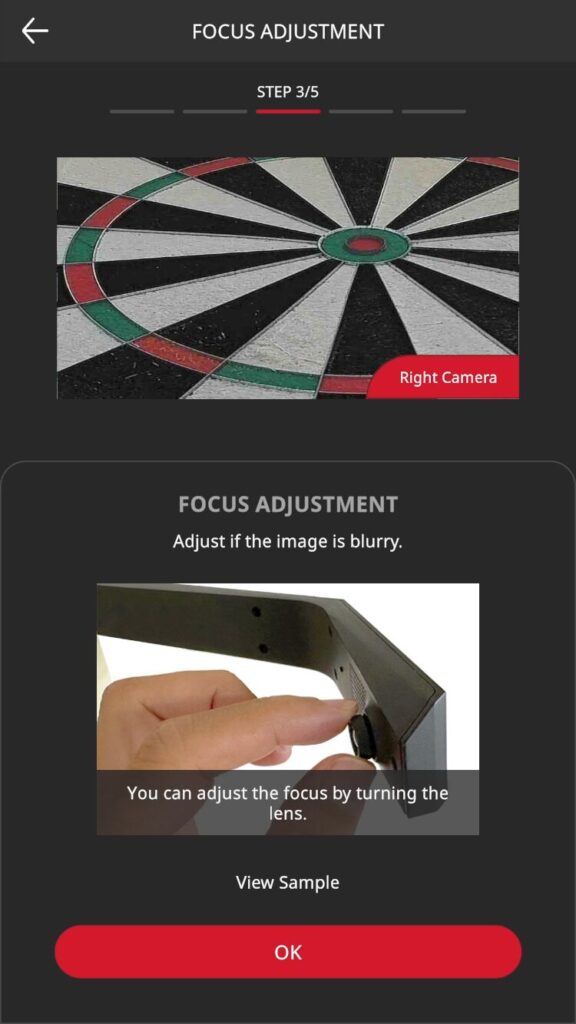
A zoom preview of the left camera will appear.
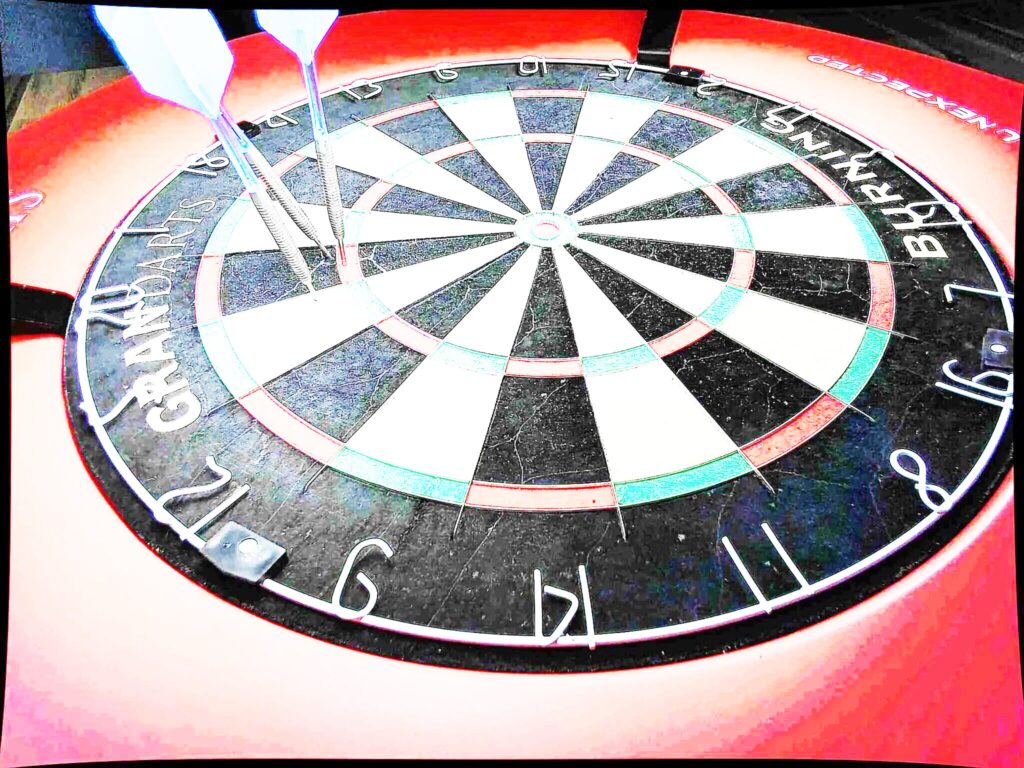
Make sure the image is not blurred.
If the image is blurry, turn the camera’s focus ring and adjust it for a clearer image.
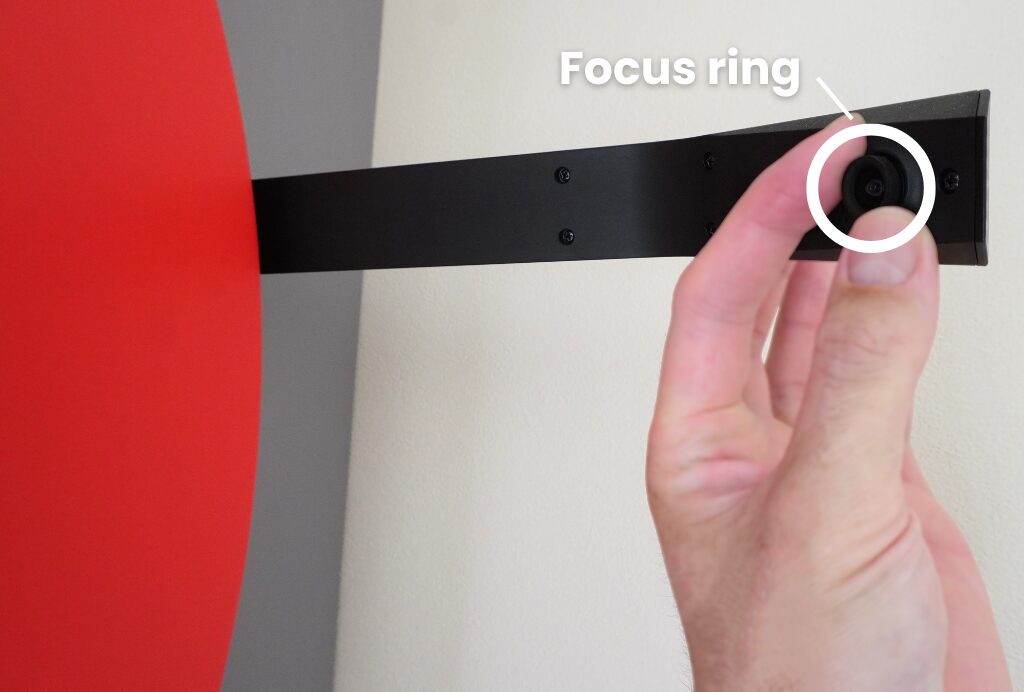
Tap “OK” when done.
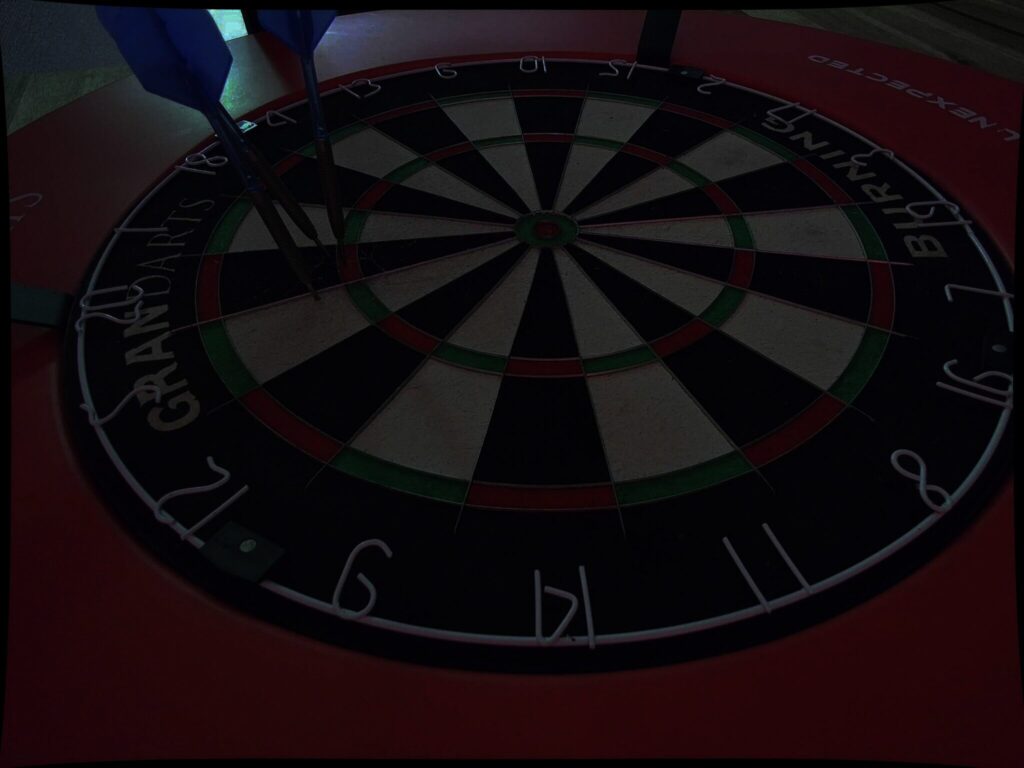
Continue with the zoom preview of the right camera.
Follow the same procedure to adjust the focus.
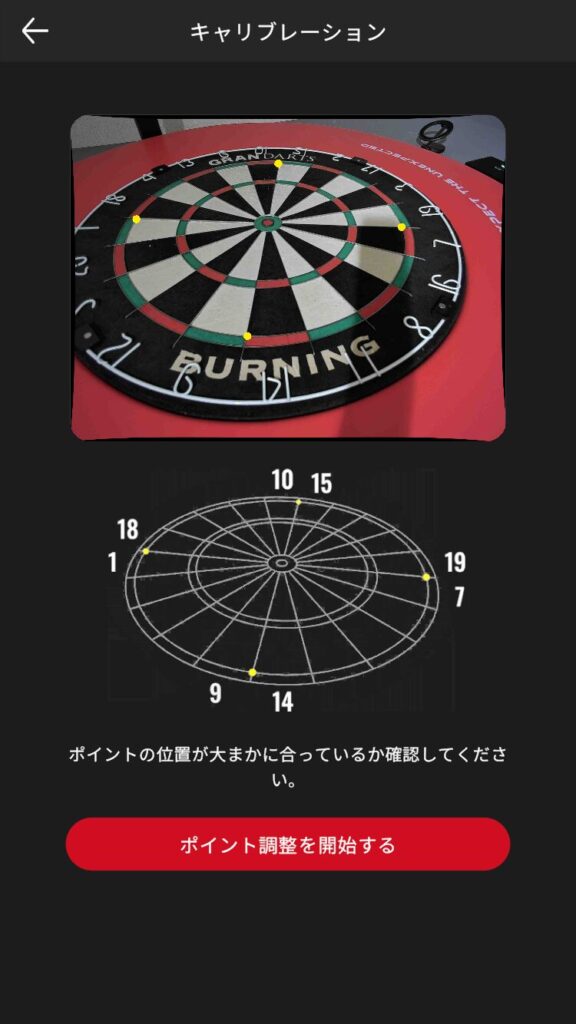
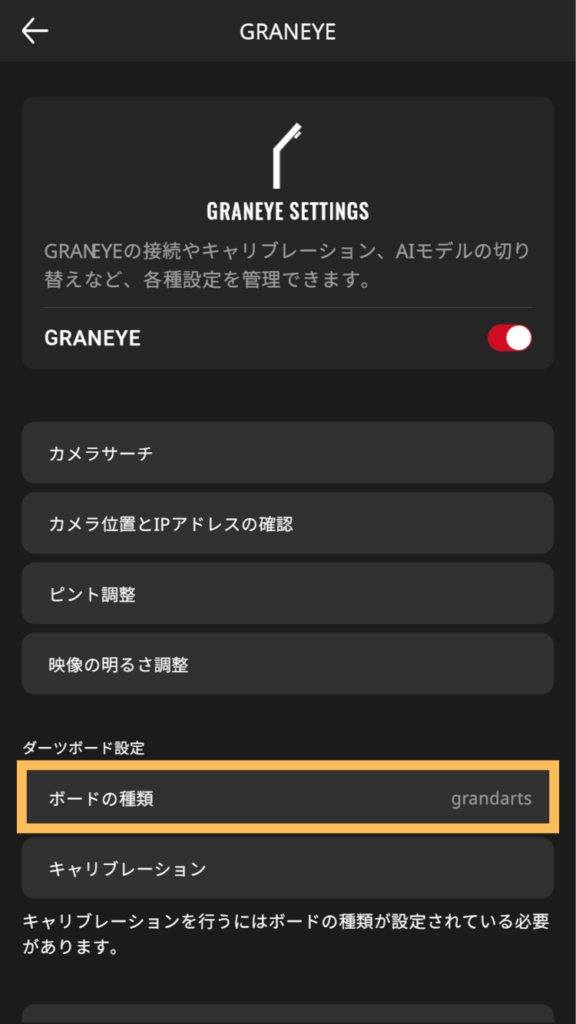
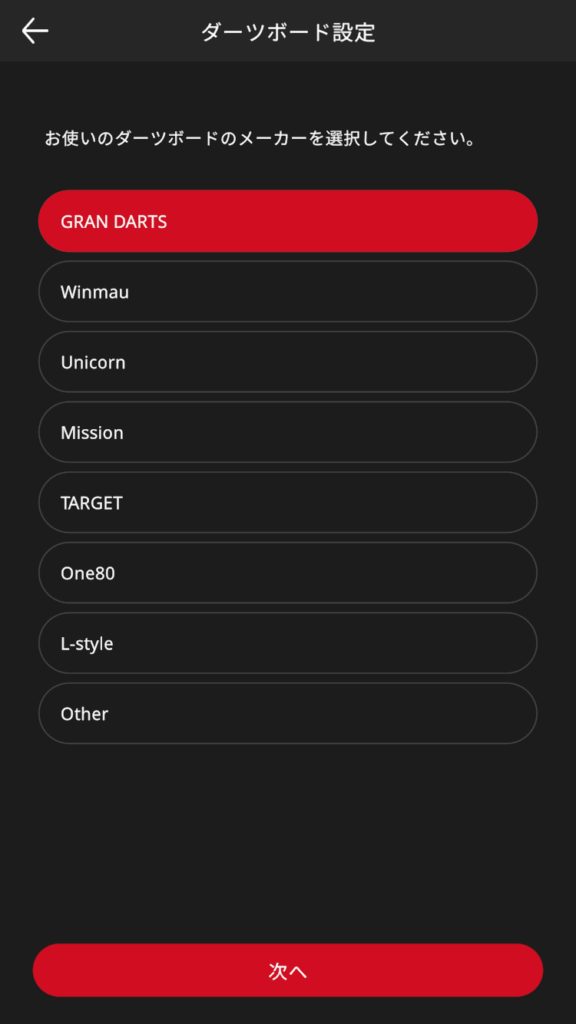
Select the dartboard to be used from the list and tap “Next”.

Tap “Start Calibration”.
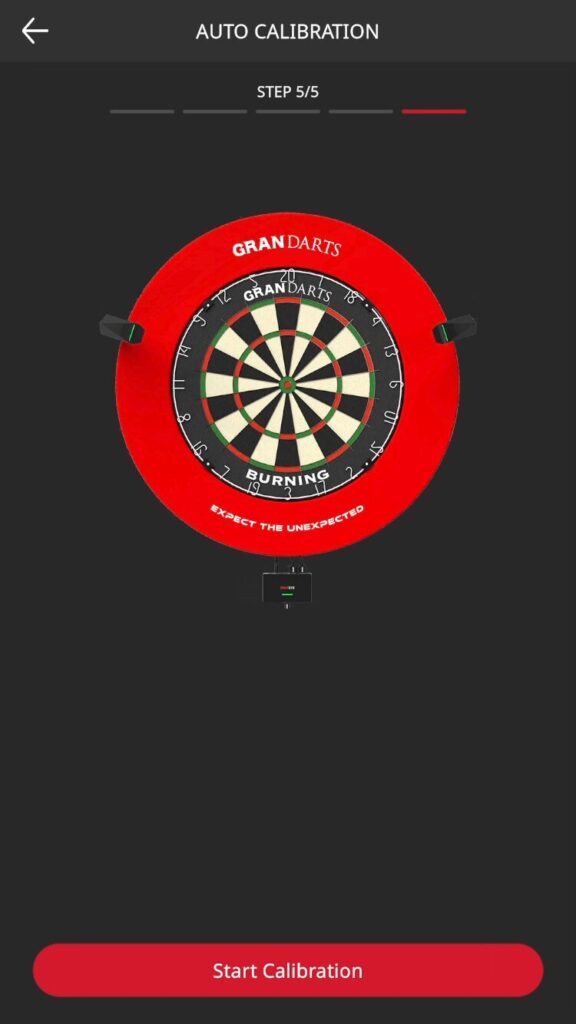
Calibration will start automatically.
Please wait a moment until it completes.
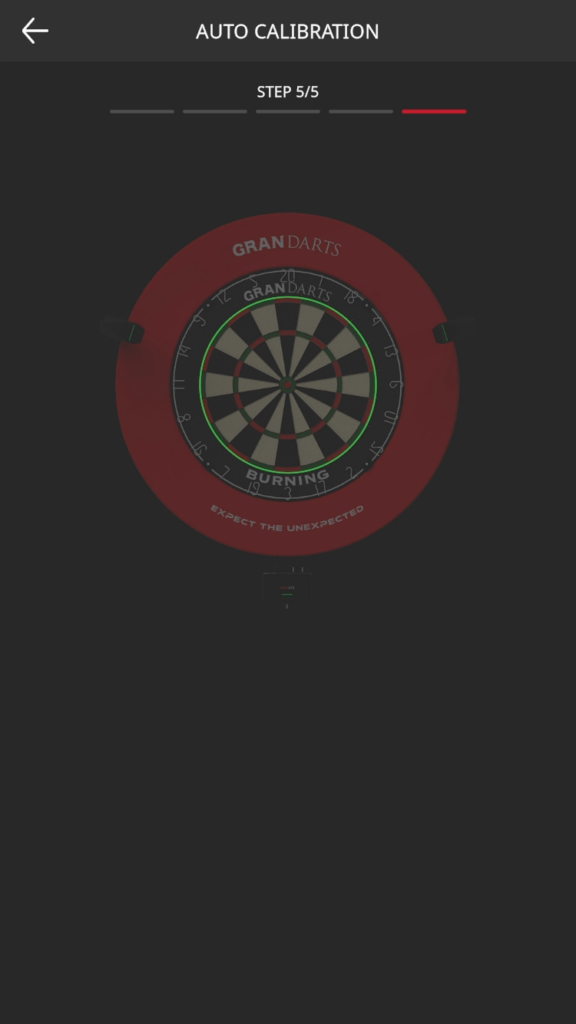
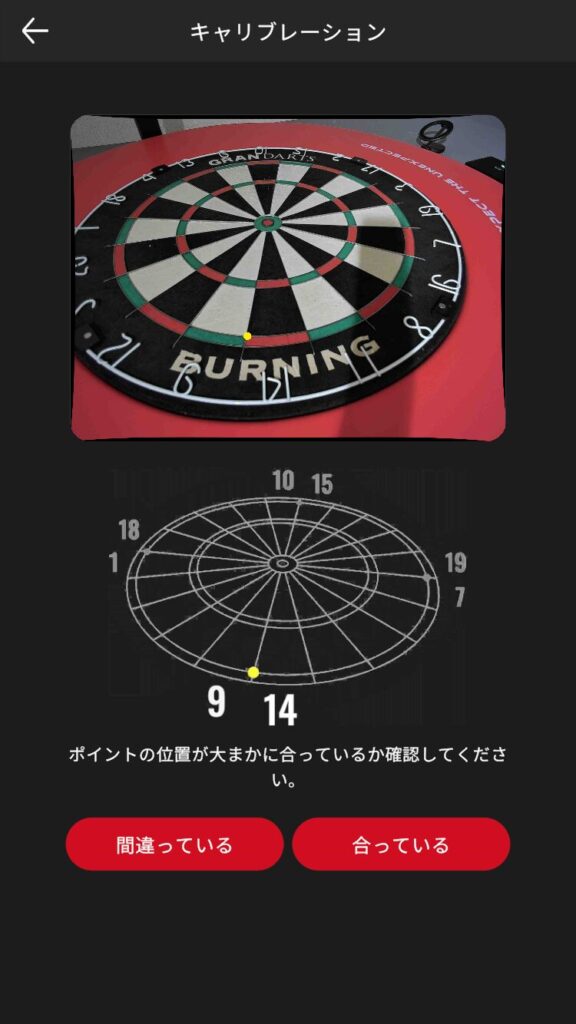
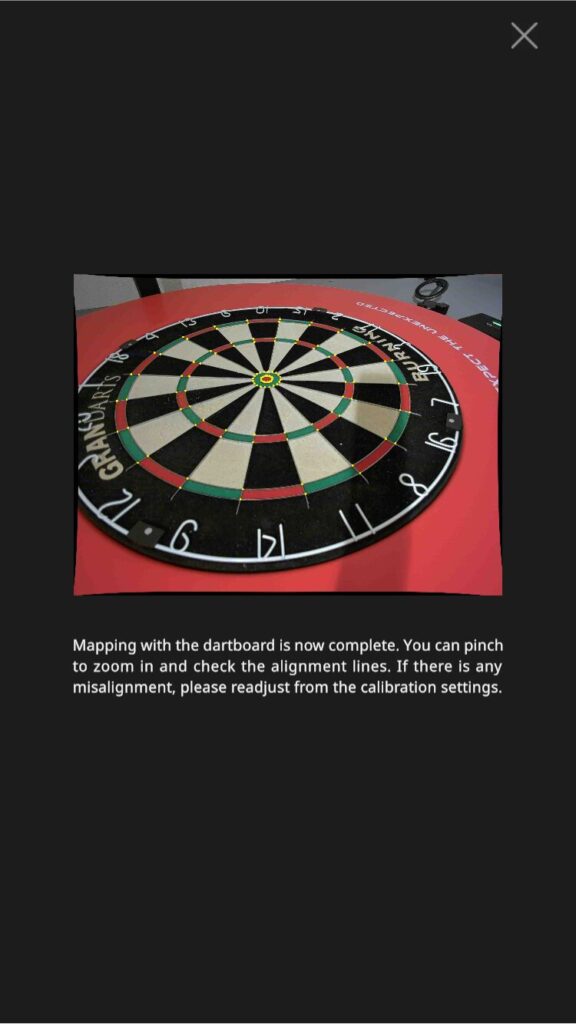
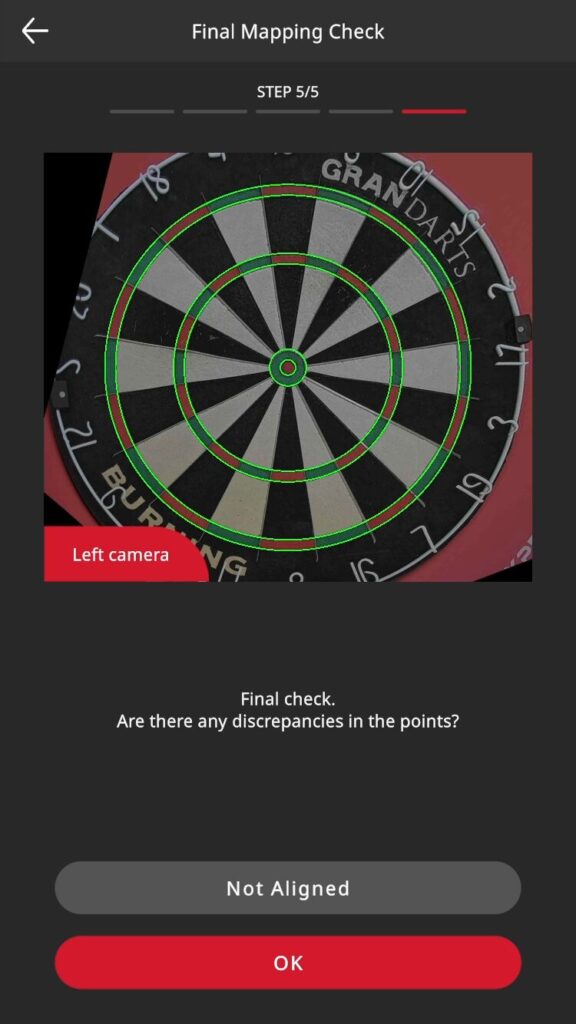
The calibration result will be displayed.
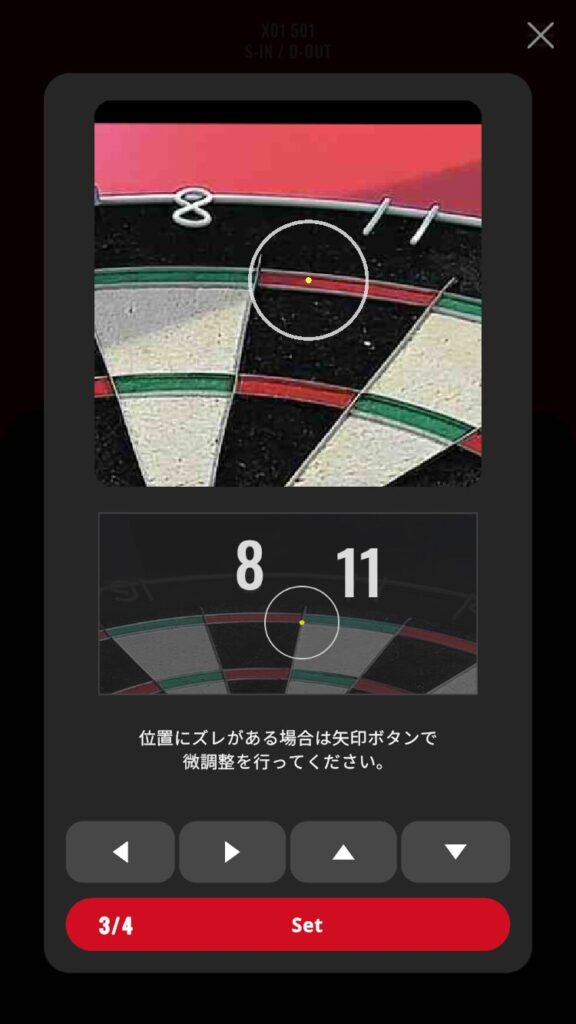
Check that the green lines align correctly with the wires. If they do, tap “OK”.
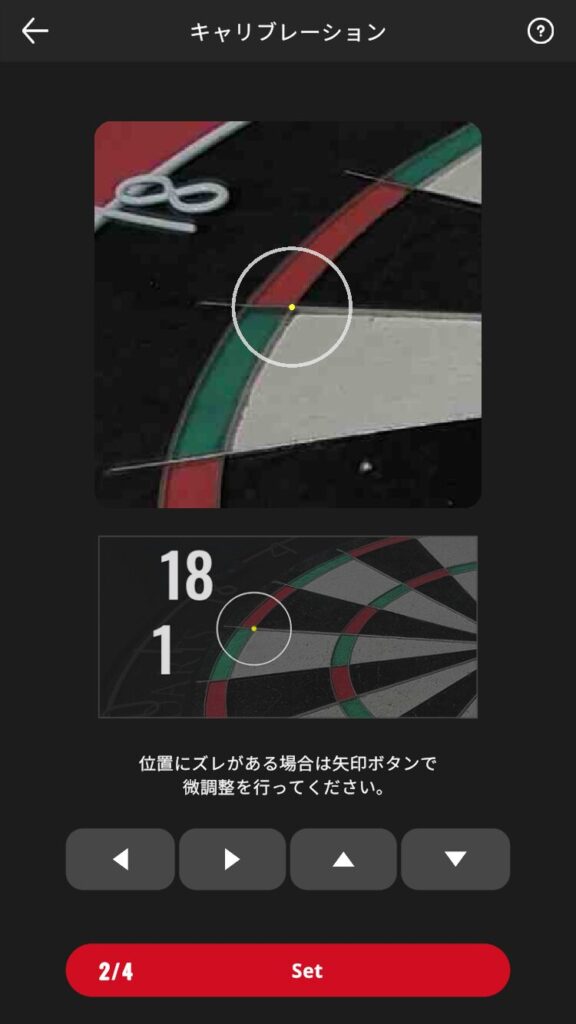
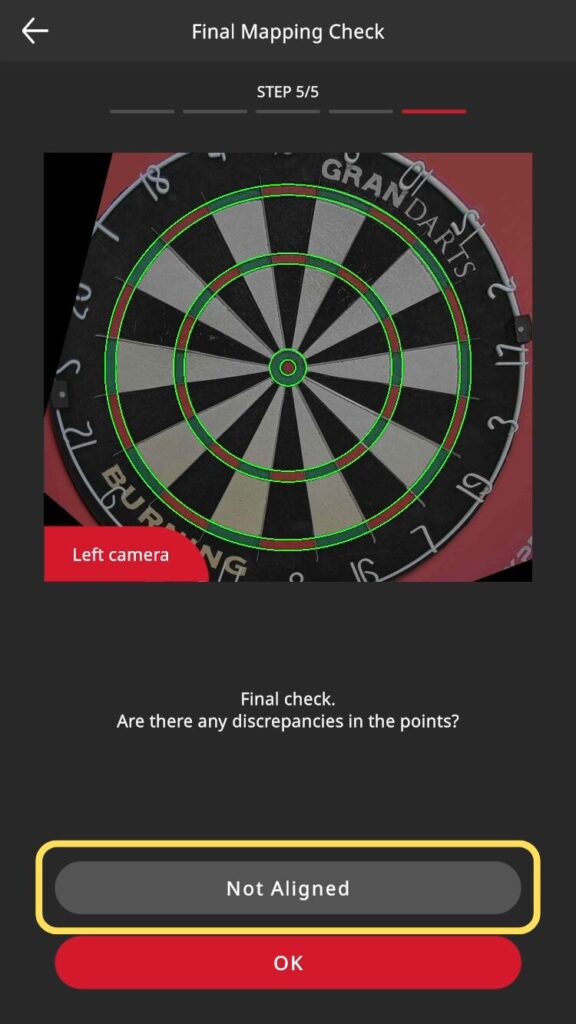
- When the position is out of alignment
-
If the line and wire are misaligned, tap “Misaligned” to manually adjust the size of the circle.
Tap the button to adjust the size of the circle and align it so that it overlaps the wire perfectly.
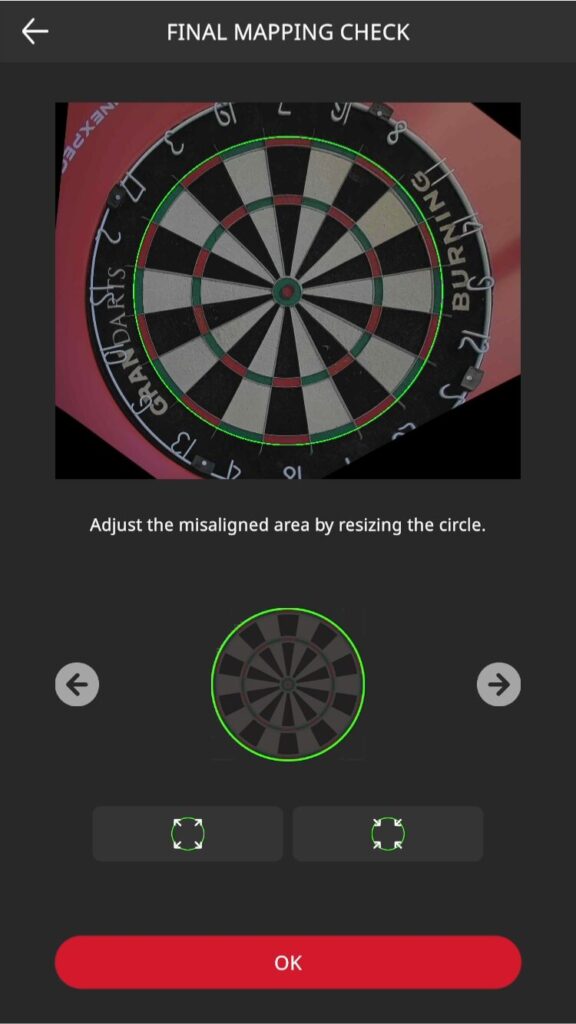
When adjustment is complete, tap “OK” to proceed.
Test that the echo unit is working properly.
Throw darts at the three areas indicated and verify that each area responds.
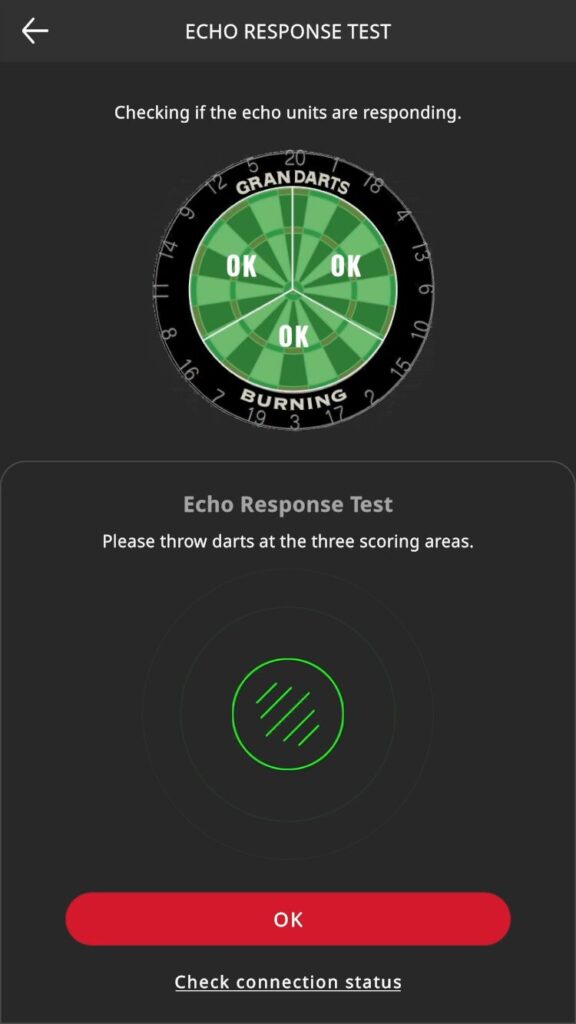
If “OK” is displayed in each area, there is no problem.
Tap the “OK” button to proceed.
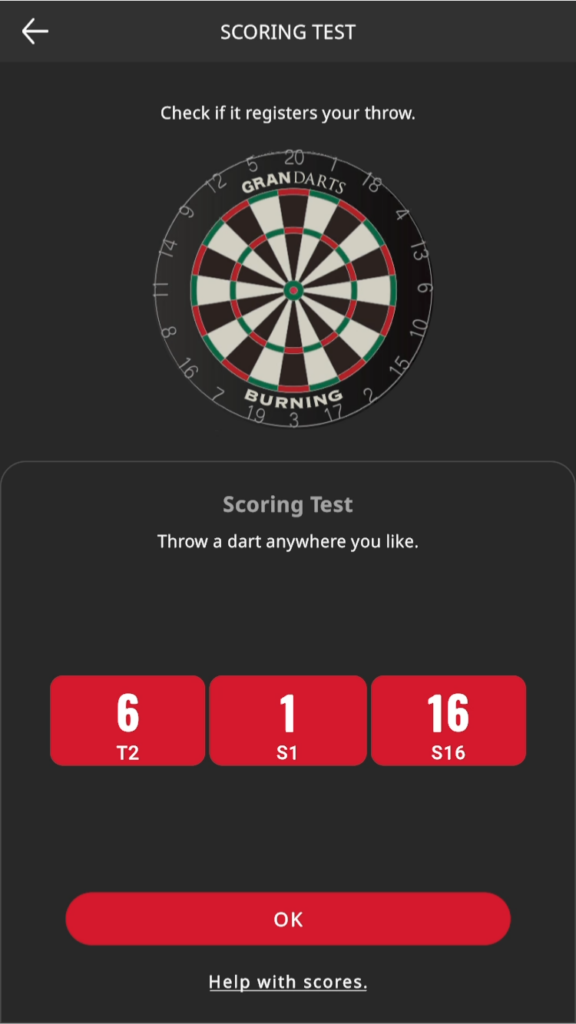
Throw a dart and check if it is scored correctly.
Tap “OK” if everything is OK.
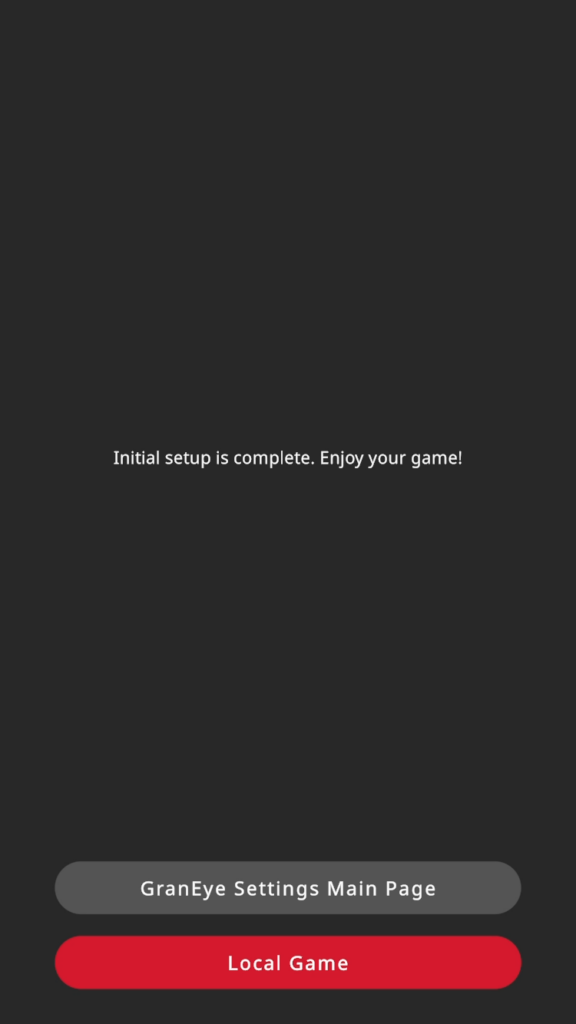
This completes the initial setup.
Please use GRAN EYE and enjoy the game.