Troubleshooting GRAN EYE connections
Troubleshooting GRAN EYE connections
When the base unit cannot be connected
If connection with the base unit fails (LED lamp does not light green), please check the following
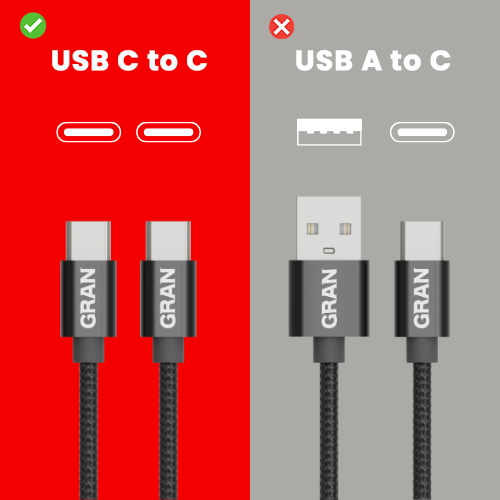
- Do you use the cables that come with the product?
-
Be sure to use the USB TypeC to C cable supplied with the product for the cable connecting the base unit and the power adapter; if a USB TypeA to C cable is used, the unit may not operate properly.
- Do you use a PD (Power Delivery) compatible power adapter?
-
The power adapter to be connected to GRAN EYE must meet the following requirements
Fast charging (Power Delivery compatible)
Please use an adapter that supports “PD (Power Delivery)” fast charging. Please use an adapter that is labeled “PD compatible” or “fast charge compatible” in the product description, or one that has multiple outputs.
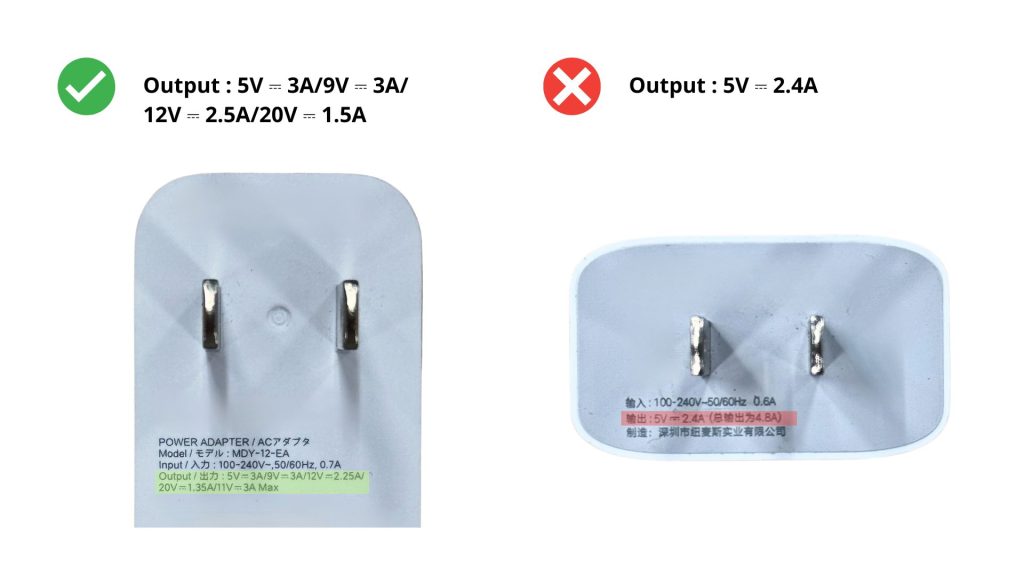
USB Type-C” plugs
GRAN EYE is powered using a USB Type-C to C cable. Please use a cable with a Tipe-C specification cable socket.
Adapters with “Type-A port” should not be used as they may lack power.
If there is insufficient power- Cannot connect to base unit or camera
- The app can’t find the camera.
- Temporary connection is established, but disconnected soon after.
- Camera image is not displayed / cannot be acquired
This may lead to the above error.
- Do you have full permissions to access the device?
-
To use GRAN EYE, you must allow all permissions from the application. If you have denied them, please change them to allow from the device settings.
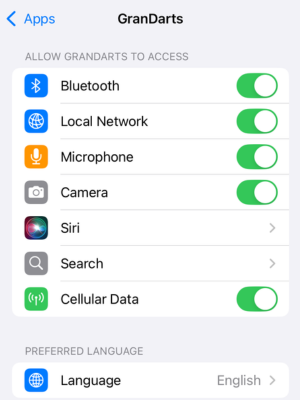
iOS 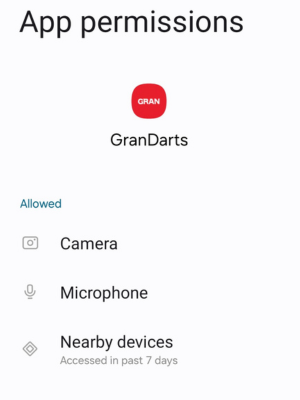
Andoroid Please refer to the user’s manual for information on how to set access privileges on your terminal.
- Is the Bluetooth connection setting on the device turned on?
-
To use Bluetooth communication, make sure the Bluetooth function of the device is turned on.
Verification Procedure- Turn off the device’s Bluetooth once and then turn it on again
- Return to the GranDarts app and wait until it automatically connects
The connection is made automatically by the app; do not perform manual pairing of Bluetooth settings.
About SSID
- What is SSID?
-
SSID refers to the “network name” displayed when connecting to Wi-Fi on a smartphone or computer.
It is assigned to your router, mobile Wi-Fi, etc. To connect to the network, you must select this SSID and enter the password.
- How to check SSID
-
SSID can be checked from your router or smartphone.
- Check from the router
-
The SSID is listed on the label on the router itself. The items marked “SSID” and “Network Name” are the network names.
If there are multiple SSIDs, choose the one marked “2.4GHz” or “Main”.
Q- Check from a smart phone
-
From a device connected to Wi-Fi, you can check the current SSID by following the steps below.
iOS devices
Settings > Wi-Fi > The name of the network you are connected to is the SSID
Android Devices
Settings > Network and Internet > Wi-Fi > The name of the network you are connected to is SSID
Q
- About 2.4GHz and 5Ghz
-
Wi-Fi has two frequency bands: 2.4GHz and 5GHz.
GRAN EYE supports only 2.4GHz Wi-Fi.Features of 2.4GHz- Resistant to walls and obstacles, easy to stabilize connection
- Widely used for general home Wi-Fi
If you cannot read the QR code
If you cannot read the QR Code, please try the following steps.
- Wait for the camera’s LED light to flash red.
-
While the LED light is red, the camera is starting up. QR Code cannot be scanned while the camera is activated; please wait a moment until the LED changes to blinking red.
If this happens, it’s OK
Flashing red
The camera is now in orbit and ready to connect to Wi-Fi.
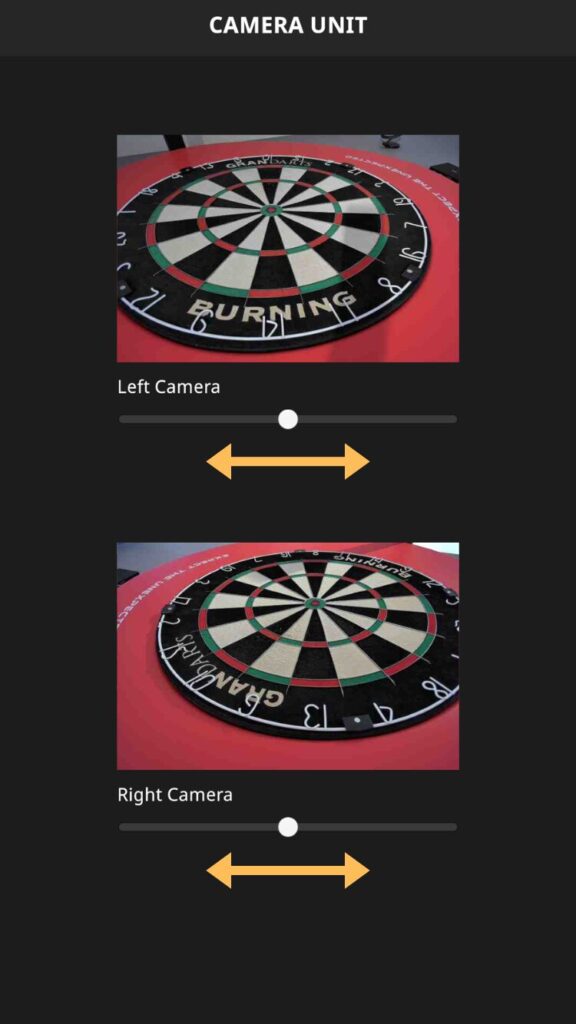
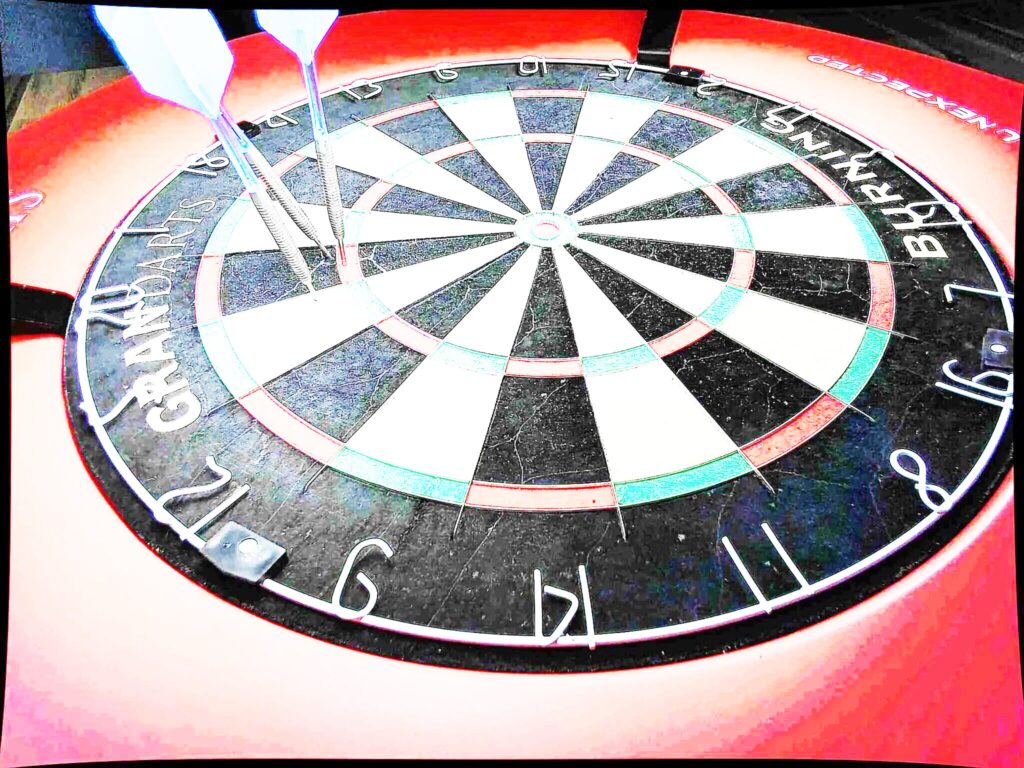
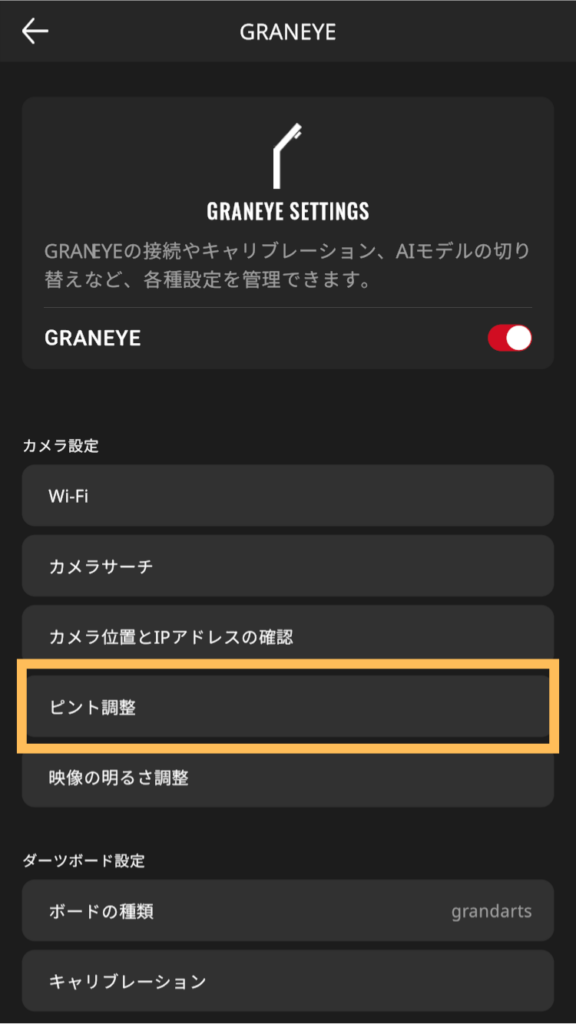
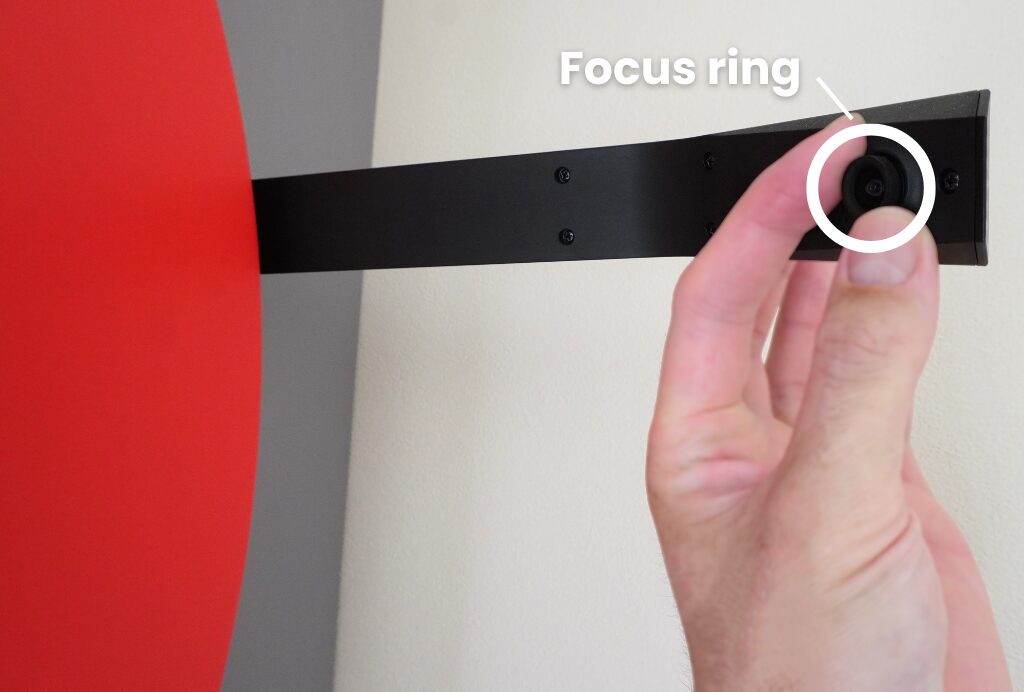
- Adjusting the camera’s focus
-
The camera lens is designed to rotate to adjust the focus. Therefore, the focus may shift when the lens cap is removed.
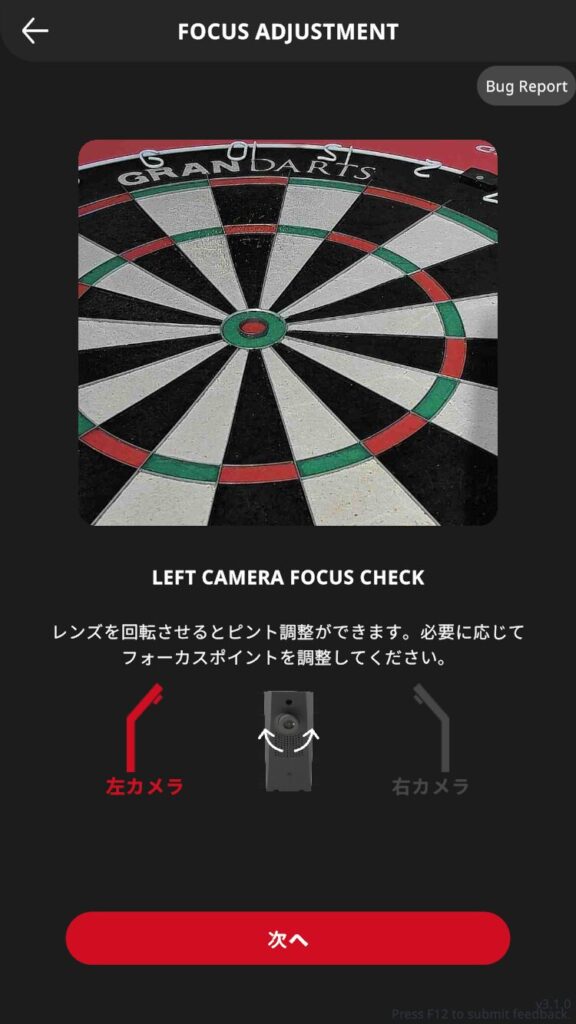
Please adjust the focus before reading the QR Code. Focus adjustment procedure
- Tighten the lens clockwise until there is no gap between the lens and the body
- From there, slowly loosen it in a counterclockwise direction for one or two laps.
- Point the QR Code camera at the QR Code and read it by moving it closer or further away from the camera.
- If the lens does not read, hold the QR over the lens again while loosening it slightly.
- Upon successful reading, the camera’s LED flashes green
If the camera LED does not light up green
If the camera’s LED light does not change to a green light after the QR code is scanned, try the following procedure.
- Using a PD-compatible power adapter
-
To use GRAN EYE, a power adapter (USB charger) capable of supplying sufficient power is required. Please prepare an adapter that has “PD compatible” or “fast charge compatible” written in the product description, or a type of adapter with multiple power outputs.
If there is insufficient power- Cannot connect to base unit or camera
- The app can’t find the camera.
- Connection is made but becomes unstable, such as being disconnected immediately.
- Camera image cannot be acquired/displayed
This may lead to the above error.
- Check Wi-Fi information
-
The SSID or password you entered may be incorrect.
Common typing mistakes- Typing errors in SSID or password
- There is a space at the end.
- 5GHz Wi-Fi input (*GRAN EYE only supports 2.4GHz)
In this case, please follow these steps to reconfigure
- Reset the camera
- Re-create the QR code with the correct Wi-Fi information
- Rescan the QR code into the camera
How to reset the camera
Press and hold the button about 5 cm below the camera lens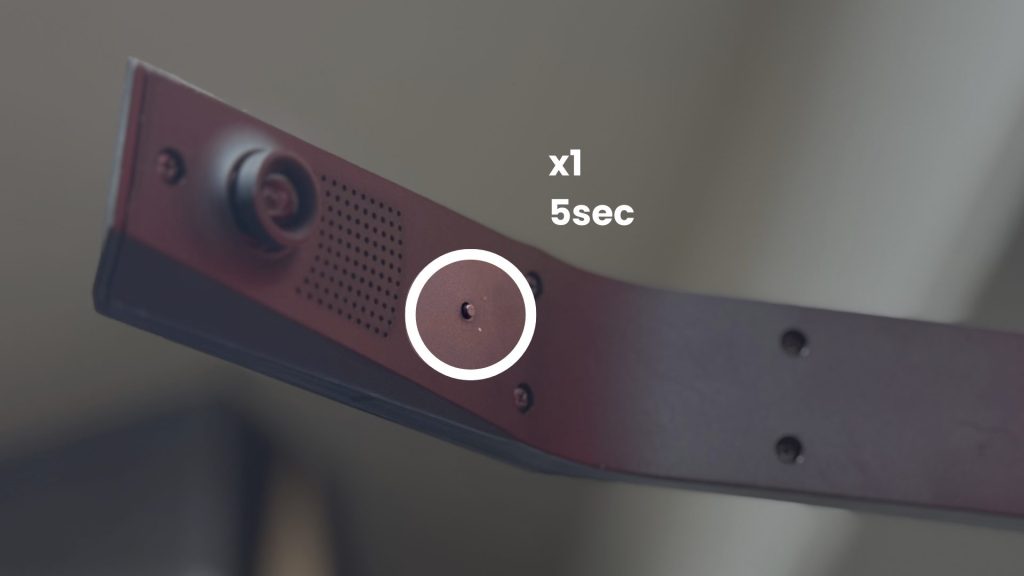 When the red status light flashes rapidly, remove your finger from the buttonWhen the camera reboots and the light changes to blinking red, the reset is complete.
When the error message “GRAN EYE could not be found” appears
- Wait for the camera to turn green.
-
Flashing green
The camera has received Wi-Fi information and is trying to connect. Once received, the Wi-Fi information is retained until reset.
When the camera’s LED is blinking green, it means it is trying to connect to Wi-Fi. A solid green light indicates that the Wi-Fi connection is complete.
If you perform a camera search while the camera LED is blinking green, the application will not be able to find the camera. Please make sure the camera is lit green before performing a camera search.
If this happens, it’s OK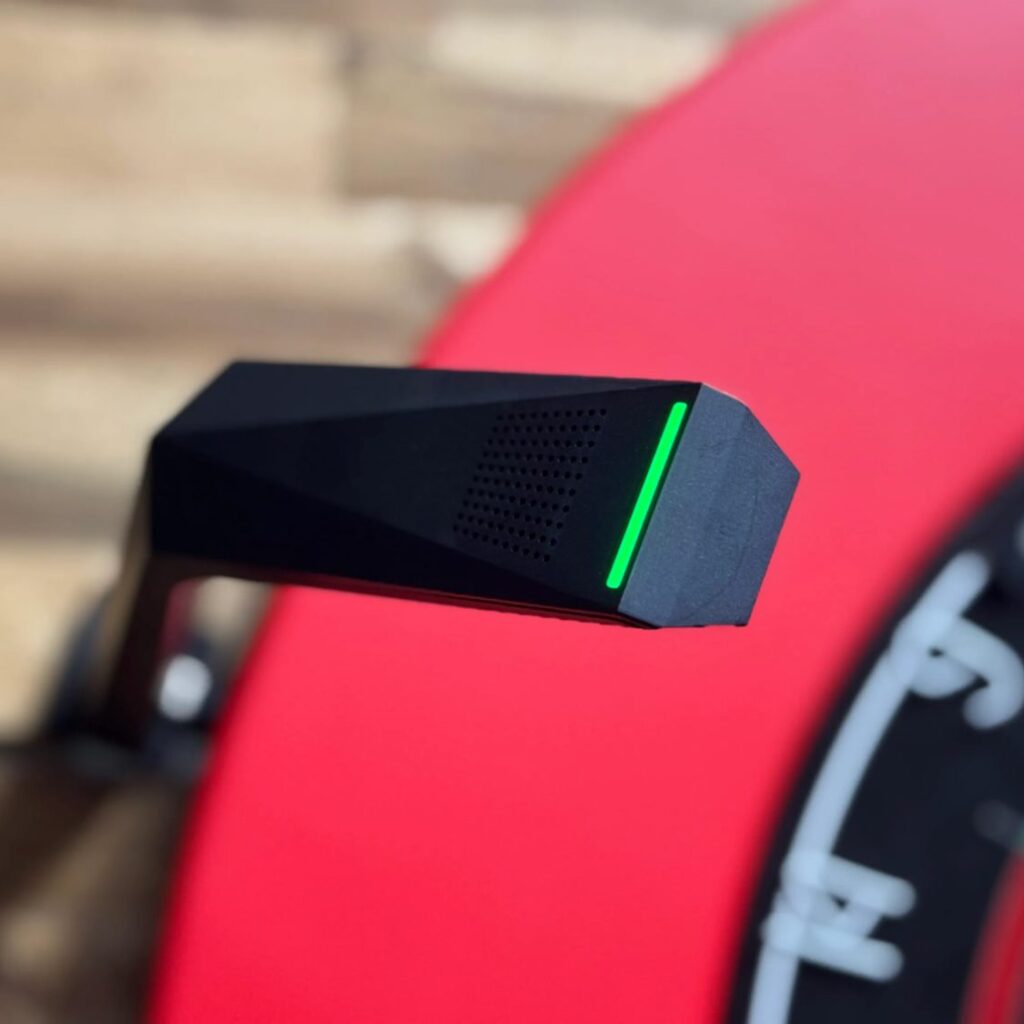
The camera has received the Wi-Fi information and is now connected to the network.
- Connecting to the same Wi-Fi
-
In order for the application to find two GRAN EYE cameras, the devices must also be connected to the same Wi-Fi. Refer to the table below to connect the camera and the terminal to the same network (Wi-Fi router).
OK Example
GRAN EYE DEVICE Supplemental Home WiFi 2.4GHz Home Wifi 2.4GHz Ideal Connection Environment Home WiFi 2.4GHz Home Wifi 5GHz Possible if router is the same, just different bandwidth Note that in rare cases, router settings may block the connection. Internet sharing from devices Mobile data communication Possible because it is the same network. Note that bandwidth may need to be configured on the device. examples
GRAN EYE DEVICES Supplemental Home Wifi 5GHz Home Wifi 5GHz GRAN EYE does not support 5GHz Home WiFi 2.4GHz Office Wifi 5GHz Different Wi-Fi destinations Home WiFi 2.4GHz Mobile data communication Unable to communicate due to different connection point
*Not recommended as it puts a high load on the device.If the camera has been scanned for incorrect Wi-Fi information, reset it.
Camera reset procedure
Press and hold the button about 5 cm below the camera lens When the red status light flashes rapidly, remove your finger from the buttonWhen the camera reboots and the light changes to blinking red, the reset is complete.If this happens, it’s OK
Flashing red
The camera is now in orbit and ready to connect to Wi-Fi.
Self-Care Guide
If the cause of the error cannot be determined, or if the problem persists after attempts to address it, please try the following procedure again to reconfigure the system.
- Self Coping Guide
-
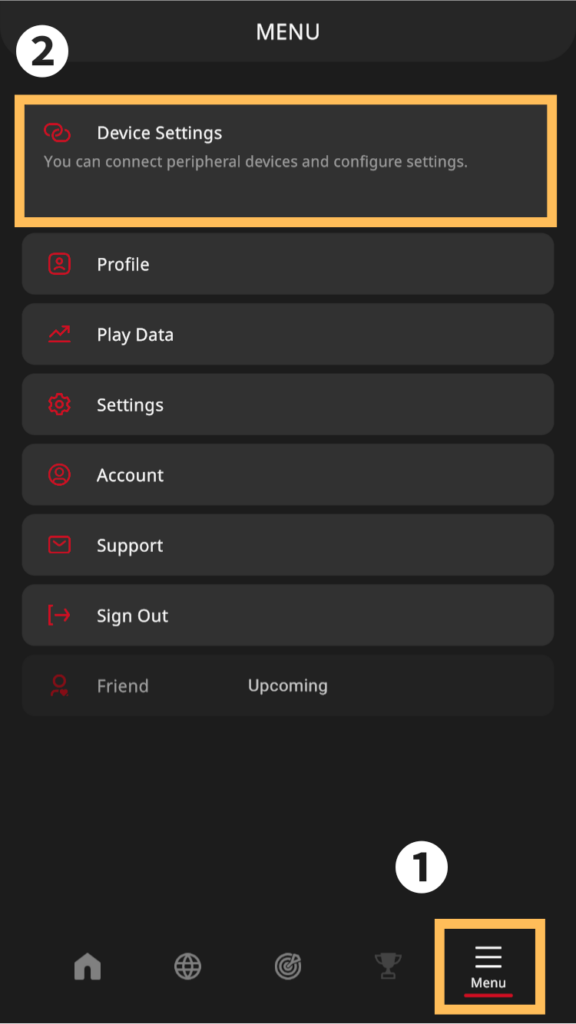
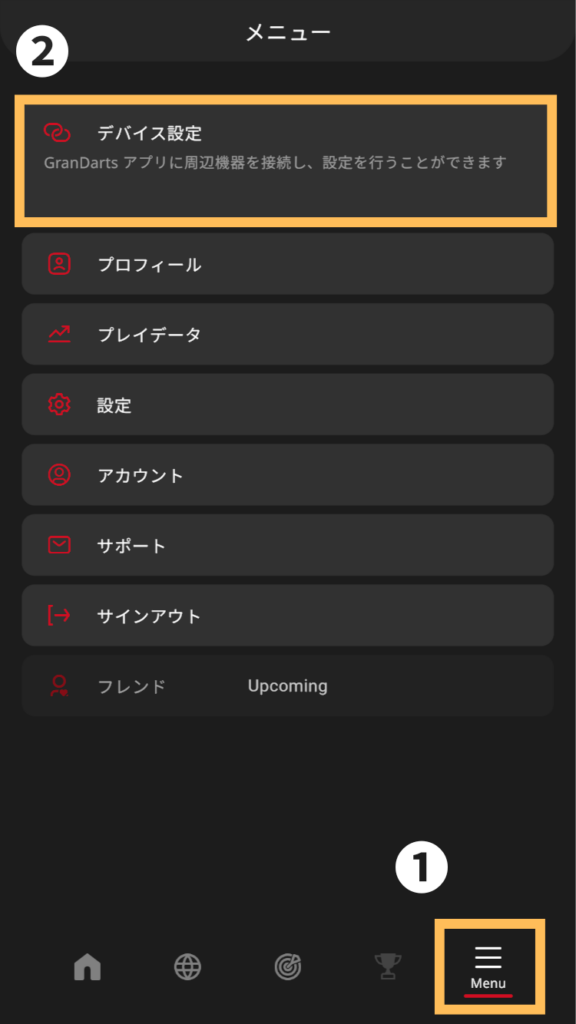
Check to see if you are authorized to access the app.For iOS
- Bluetooth
- local network
For Android- location information (as used by location-based services, e.g. GPS position)
- Devices in the vicinity
Turn off the device’s Wi-Fi once and then turn it onMake sure the camera and device are connected to the same Wi-FiThe camera and your smartphone/tablet must be connected to the same network (Wi-Fi router).
If you have more than one Wi-Fi router, please make sure that the camera and your device are not connected to different routers. If they are connected to different routers, the camera cannot be found.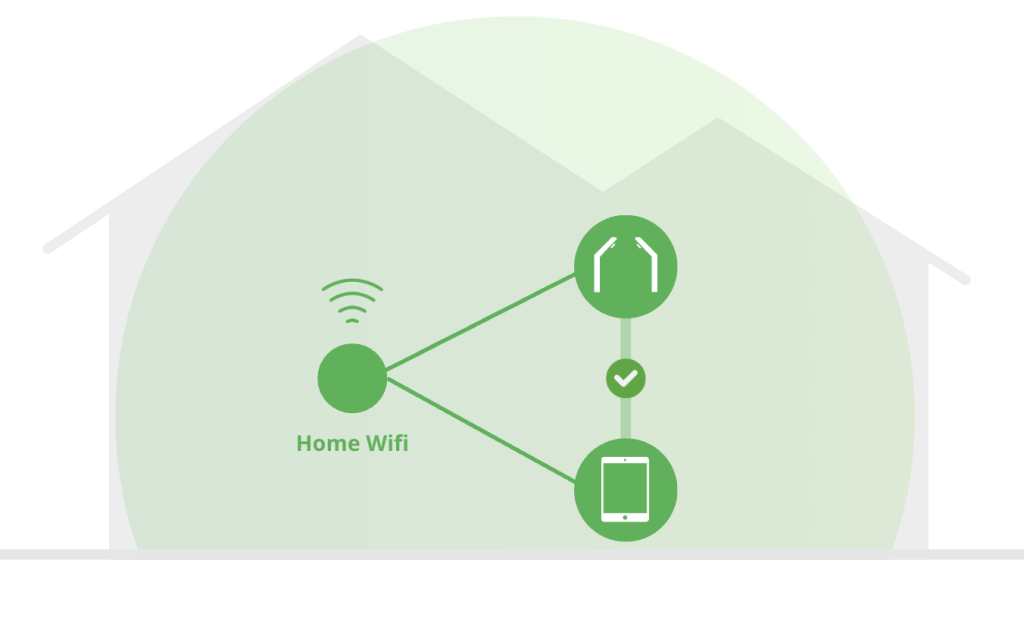
OK|The device and GRAN EYE are connected to the same Wi-Fi. 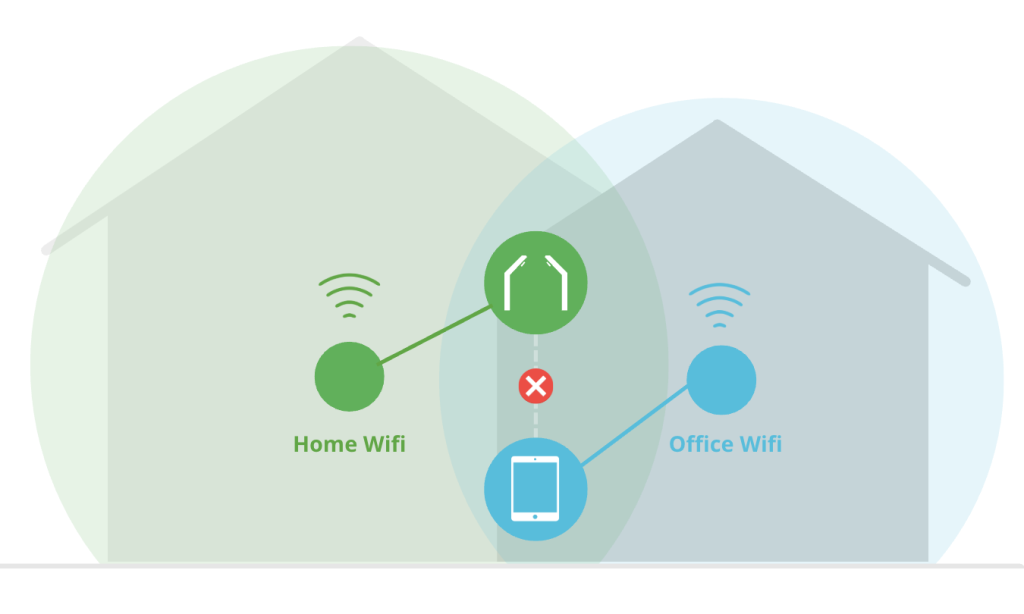
NG|The device and GRAN EYE are connected to different Wi-Fi. Restart the applicationReboot the cameraRestart the terminalRestart your smartphone/tablet.
Reset the cameraResetting will reset the Wi-Fi information.
- Press and hold the button about 5 cm below the camera lens
- When the camera LED flashes red at high speed, remove your finger from the button
- When the camera reboots and the normal red flashing light comes on, the reset is complete.
- After resetting, please go back to the previous screen and re-enter your Wi-Fi information
If this happens, it’s OKFlashing red
The camera is now in orbit and ready to connect to Wi-Fi.
Reinstall the applicationReinstallation may improve the situation by clearing unnecessary cache and temporary data that may cause problems.
For iOS- Uninstall the GranDarts application
- Reinstall the GranDarts app
For AndroidIn Android, some data may remain in the device even after uninstalling an application. To completely restore the device to its initial state, please “Delete App Data (Erase Storage)” before uninstalling.
- Open the Settings application
- Select “Apps” -> “GranDarts” app.
- Go to “Storage and Cache
- Tap “Clear Storage” or “Delete Data”. This will completely delete all app settings and remaining data.
This will completely delete all app settings and remaining data. - Uninstall the GranDarts application
- Reinstall the GranDarts app
Review the Wi-Fi router’s security settings.Some Wi-Fi router settings may block communication between devices (GRAN EYE and devices) that are connected to the same network.
Please access the router’s settings screen and check the following items.Item Commonly used different names Contents/Supplementation AP isolation Isolation between clients / Inhibition of communication between wireless terminals A setting that blocks communication between terminals within a network. Turn off. SSID-to-SSID Isolation VLAN isolation A setting to isolate networks when there are multiple SSIDs (e.g., 2.4G and 5G). Please turn off. Firewall -Firewall In addition to the original purpose of a firewall, which is to restrict communication with the outside world, it may also restrict communication between devices within the network. Guest Network Guest Wi-Fi Guest networks usually block communication with the internal network. Guest networks should not be used. Compatibility Priority. -Compatibility This setting is for network sharing (desiring) on the device side. When on, the camera will be assigned a 2.4 GHz SSID. *For questions regarding Wi-Fi router settings, please contact the manufacturer.
Initialize the cameraInitialization resets the internal programs to the factory defaults.
Wi-Fi information is not reset.Reset Procedure- Press the button about 5 cm below the camera lens 5 times quickly
- When the camera LED flashes red at high speed, remove your finger from the button
- Initialization is complete when the camera reboots and blinks green.
- Wait for the camera to connect to Wi-Fi and turn green
If this happens, it’s OKFlashing green
The camera has received the Wi-Fi information and is trying to connect.
After initialization, be sure to perform a firmware update.
If your symptoms do not improve after trying the information in this article, please contact us from below.